
There's always something that needs to be taken apart.
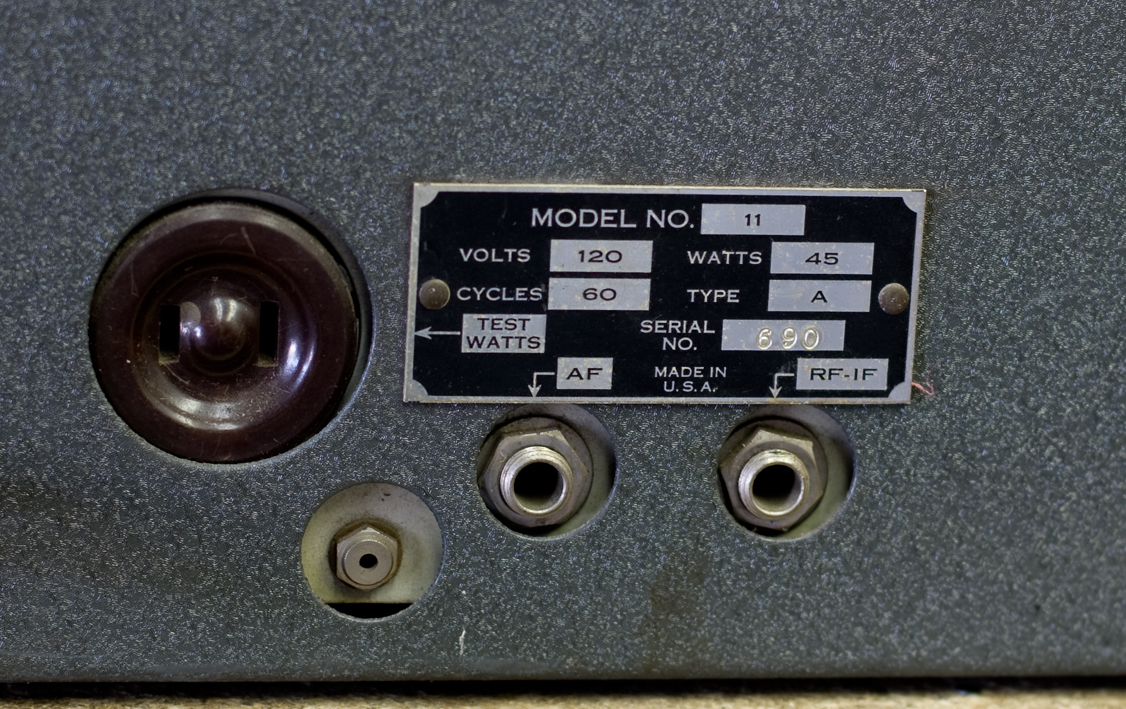
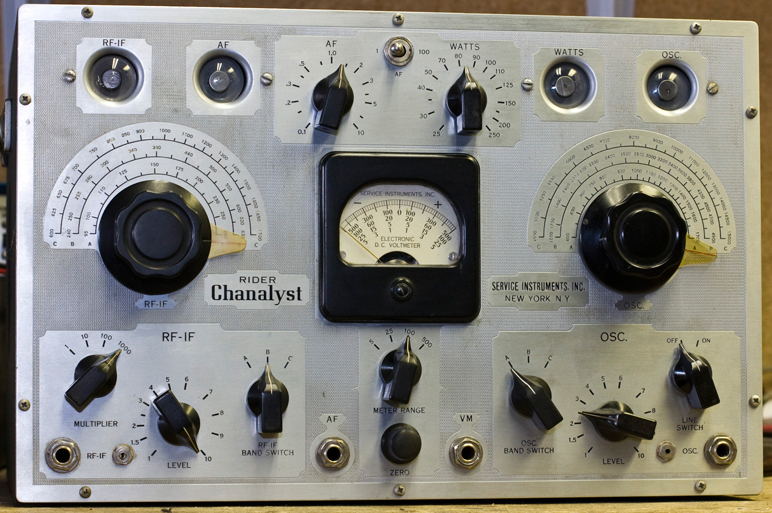
Rider Chanalyst Model 11
Background and other information is on my Test Equipment page.
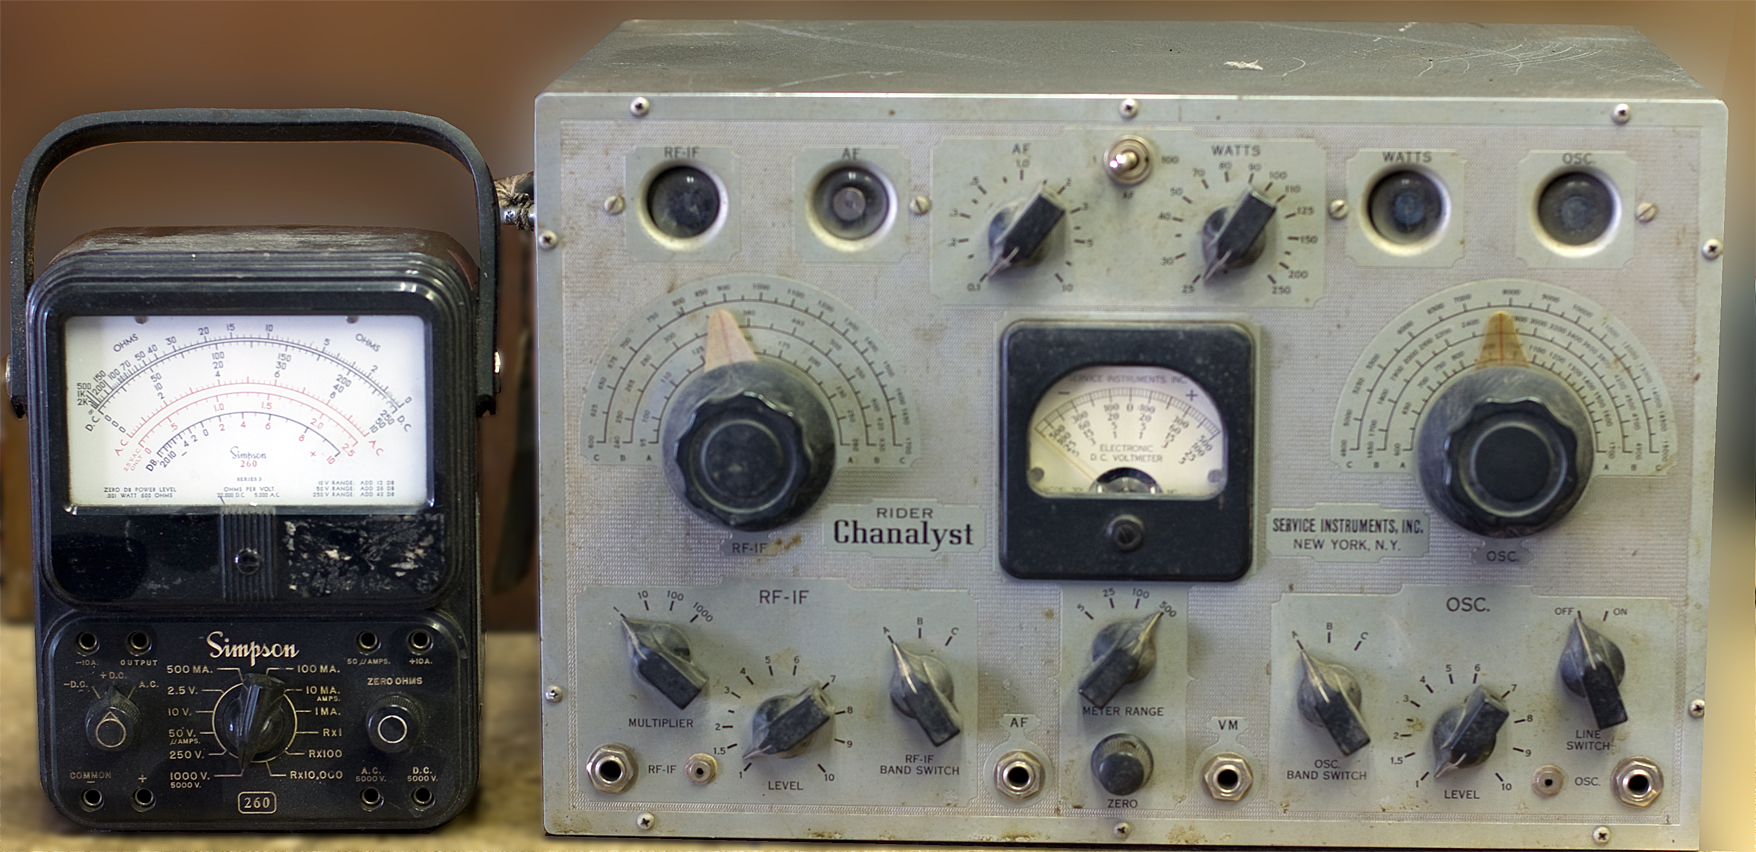
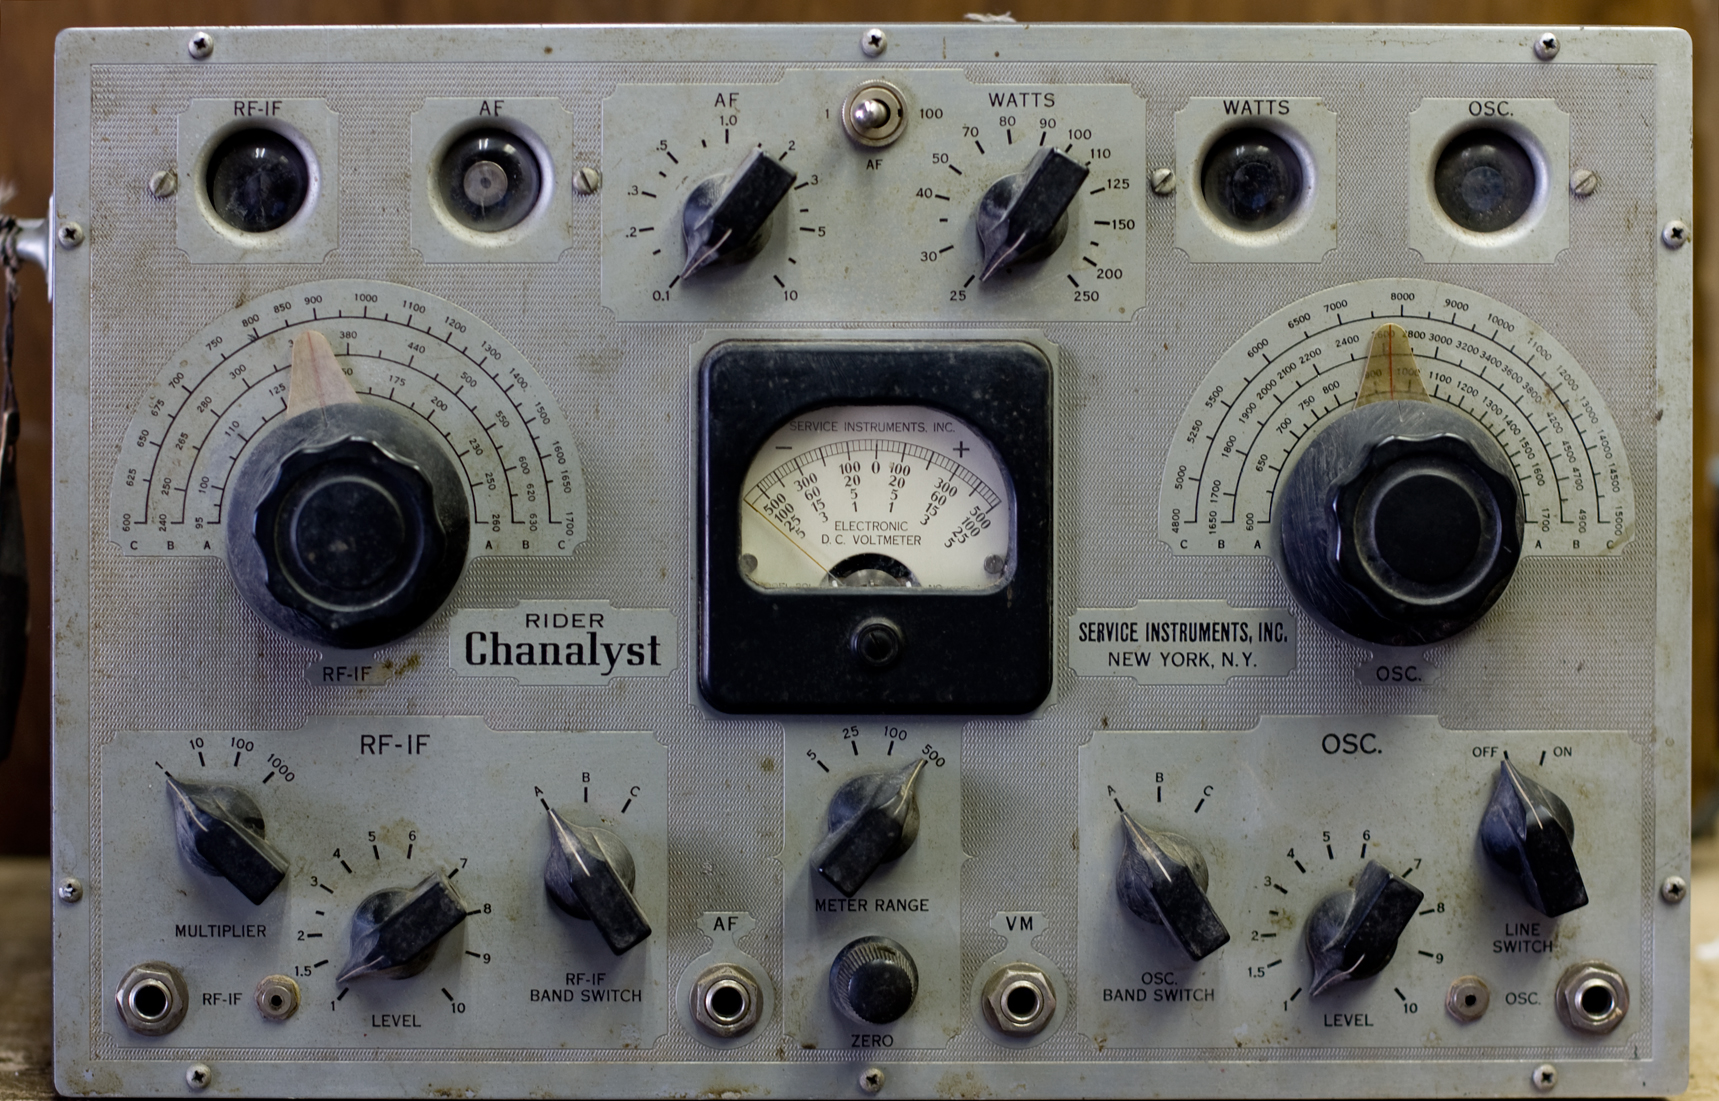
First impression: it's smaller than I thought. I photographed it here next to a Simpson 260 for scale.
To no-one's surprise, this arrived largely DOA. I went ahead and plugged it in (via a Variac), slowly applied power and gave it the sniff test. The magic eyes were very weak but I could kinda make out that one or two were sort of working.
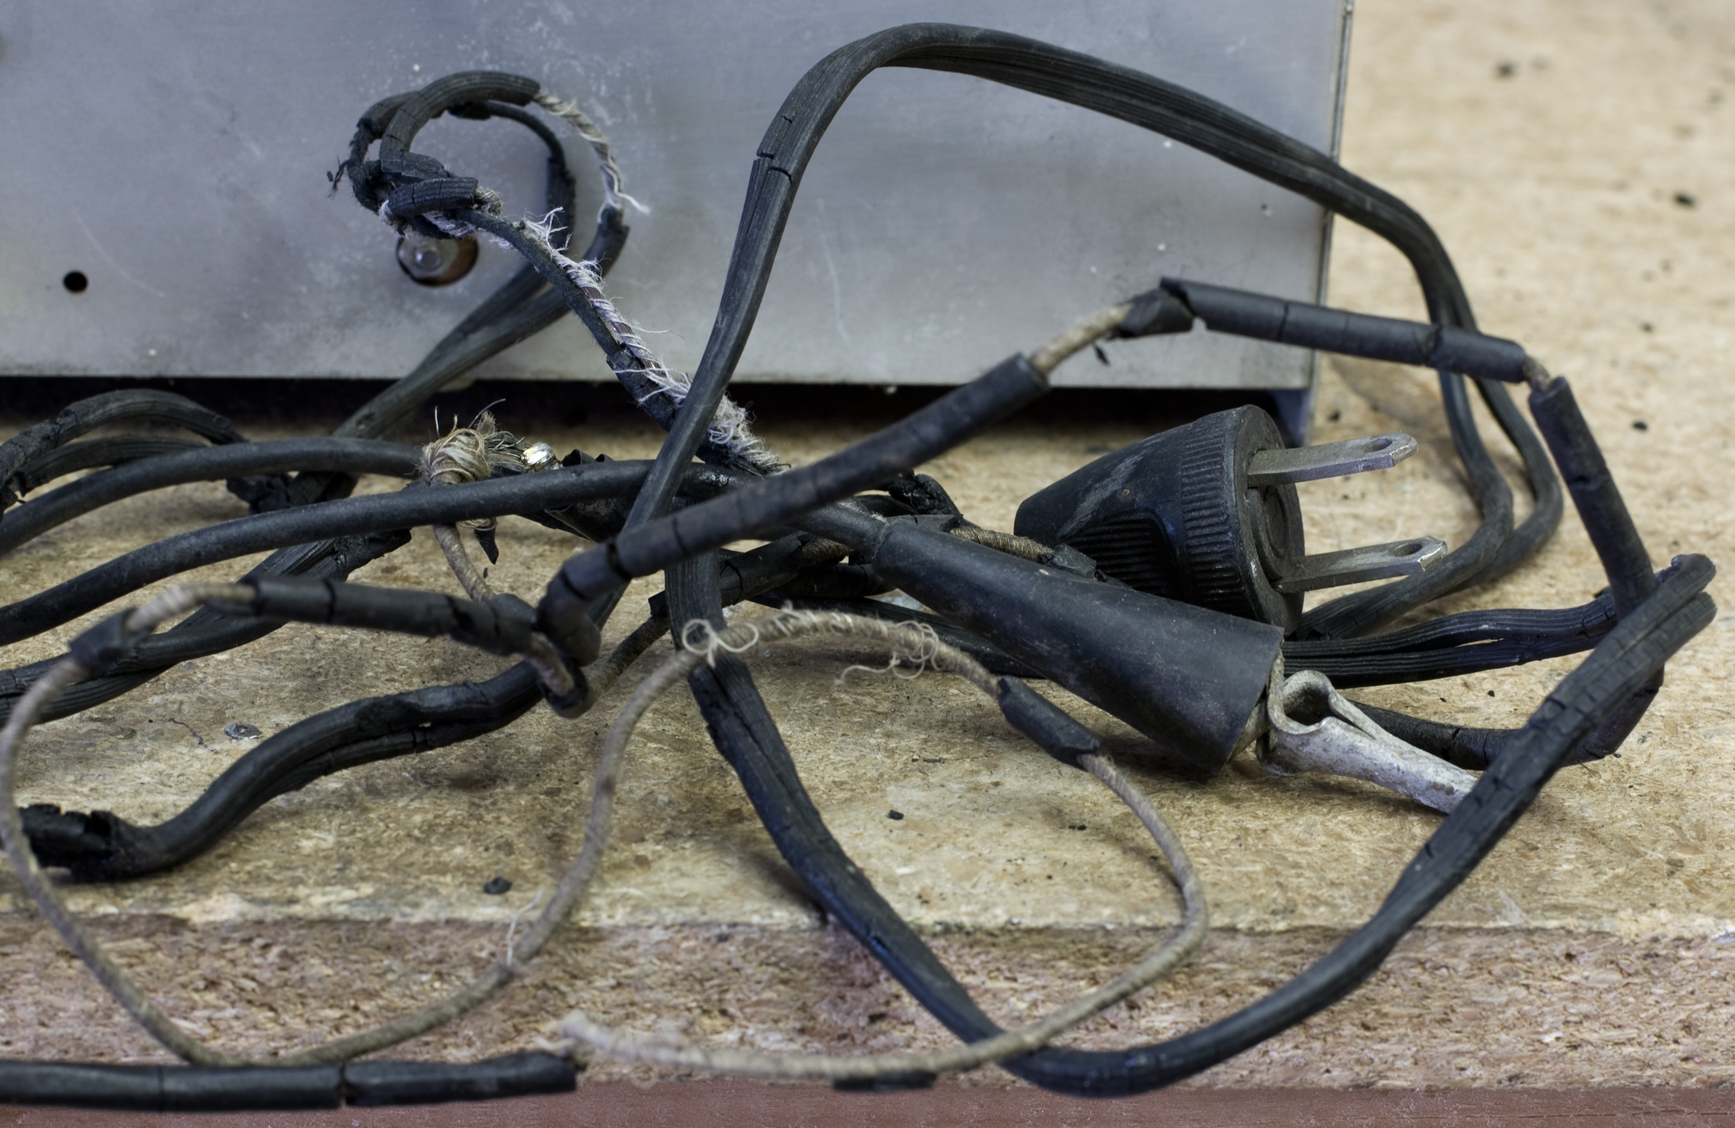
So I took it out of the case. One dead spider: check. Components look original or near it. The power cord is disintegrating and will have to be replaced. No internal batteries so no acid leaks.
Toobs
I pulled the four eye tubes and checked them: three Philcos and a National Union. All were very weak but worked. If I worked in the dark the eyes might be bright enough to be useful. I had two good ones to swap out but I'll have to order two more to do them all, and that leaves me with no pantry stock. I'm tempted to try and convert it to use 1629s.
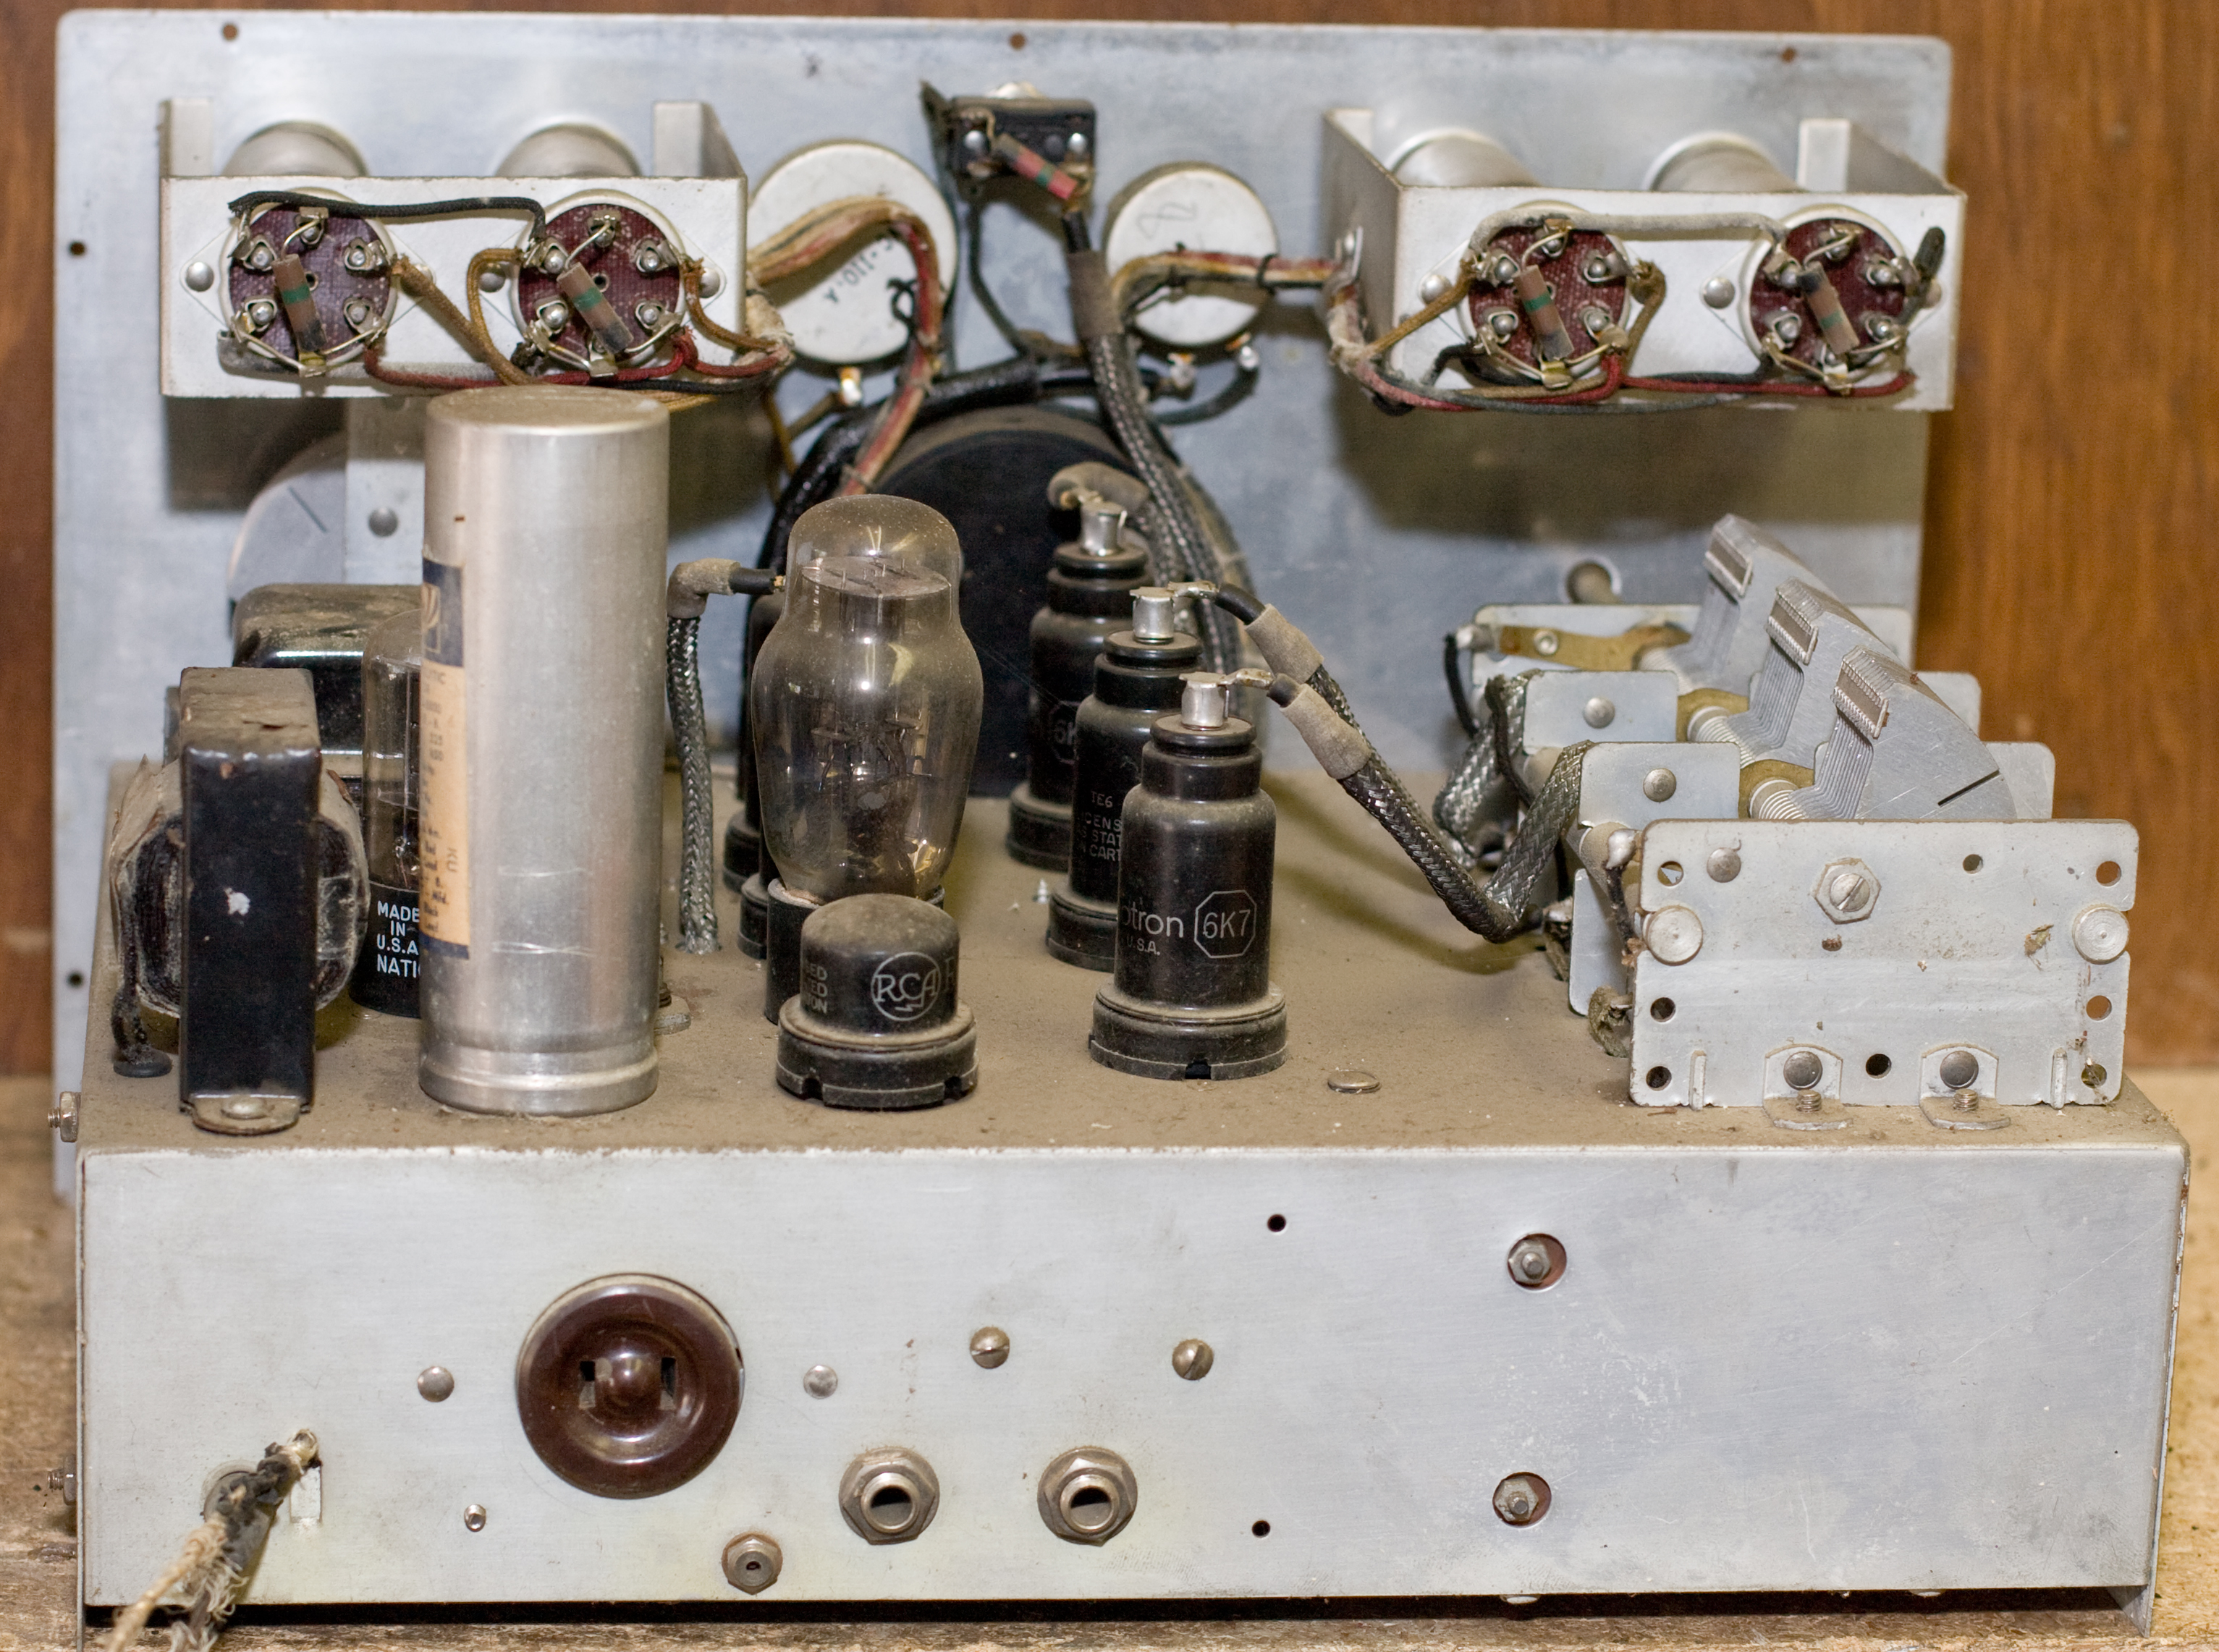
Now the mule kick. I like tubes, but I can see how other people hate them. This thing has the following tube compliment. How's this for a mix:
Four 6E5 magic eyes
Three 6K7 triple-grid, super-control amplifiers
One 6Q7 double-diode, hi-mu triode
One 6H6 twin diode
One 6X5 full-wave rectifier
One 1852 (6AC7) pentode
and one 76 super-triode amplifier/detector
All of the 6K7s were shorted, and they're all metal. I looked through my inventory: I had three 6K7s, all glass. At first I was wondering whether they used metal tubes because they wanted the shielding, or if it was just a manufacturing choice. Didn't matter because mine wouldn't work anyway. I have one GT which fit, but my other two were big ol' ST types and the grid-cap tethers wouldn't reach. So I'll have to buy metal replacements regardless (or GTs and consider shielding).
The 1852 was good, thank God. I couldn't find it in the books on my shelf, but the Hickok tube tester listed it on the roll so I tried it. I later found it on the computer. Tung Sol simply called it a pentode; RCA, in its HB3 book, calls it a television amplifier pentode. It's also equivalent to a 6AC7.
The 6Q7 was also shorted, luckily I had that, a glass-for-glass swap. The original may well have been metal too. [Later note: according to the RCA 162C manual, they used a 6Q7GT/G]
The rest tested okay, including the 76. I was very happy about that because I don't have any of those in stock.
So for the time being I'm in limbo until I get the replacement 6K7s.

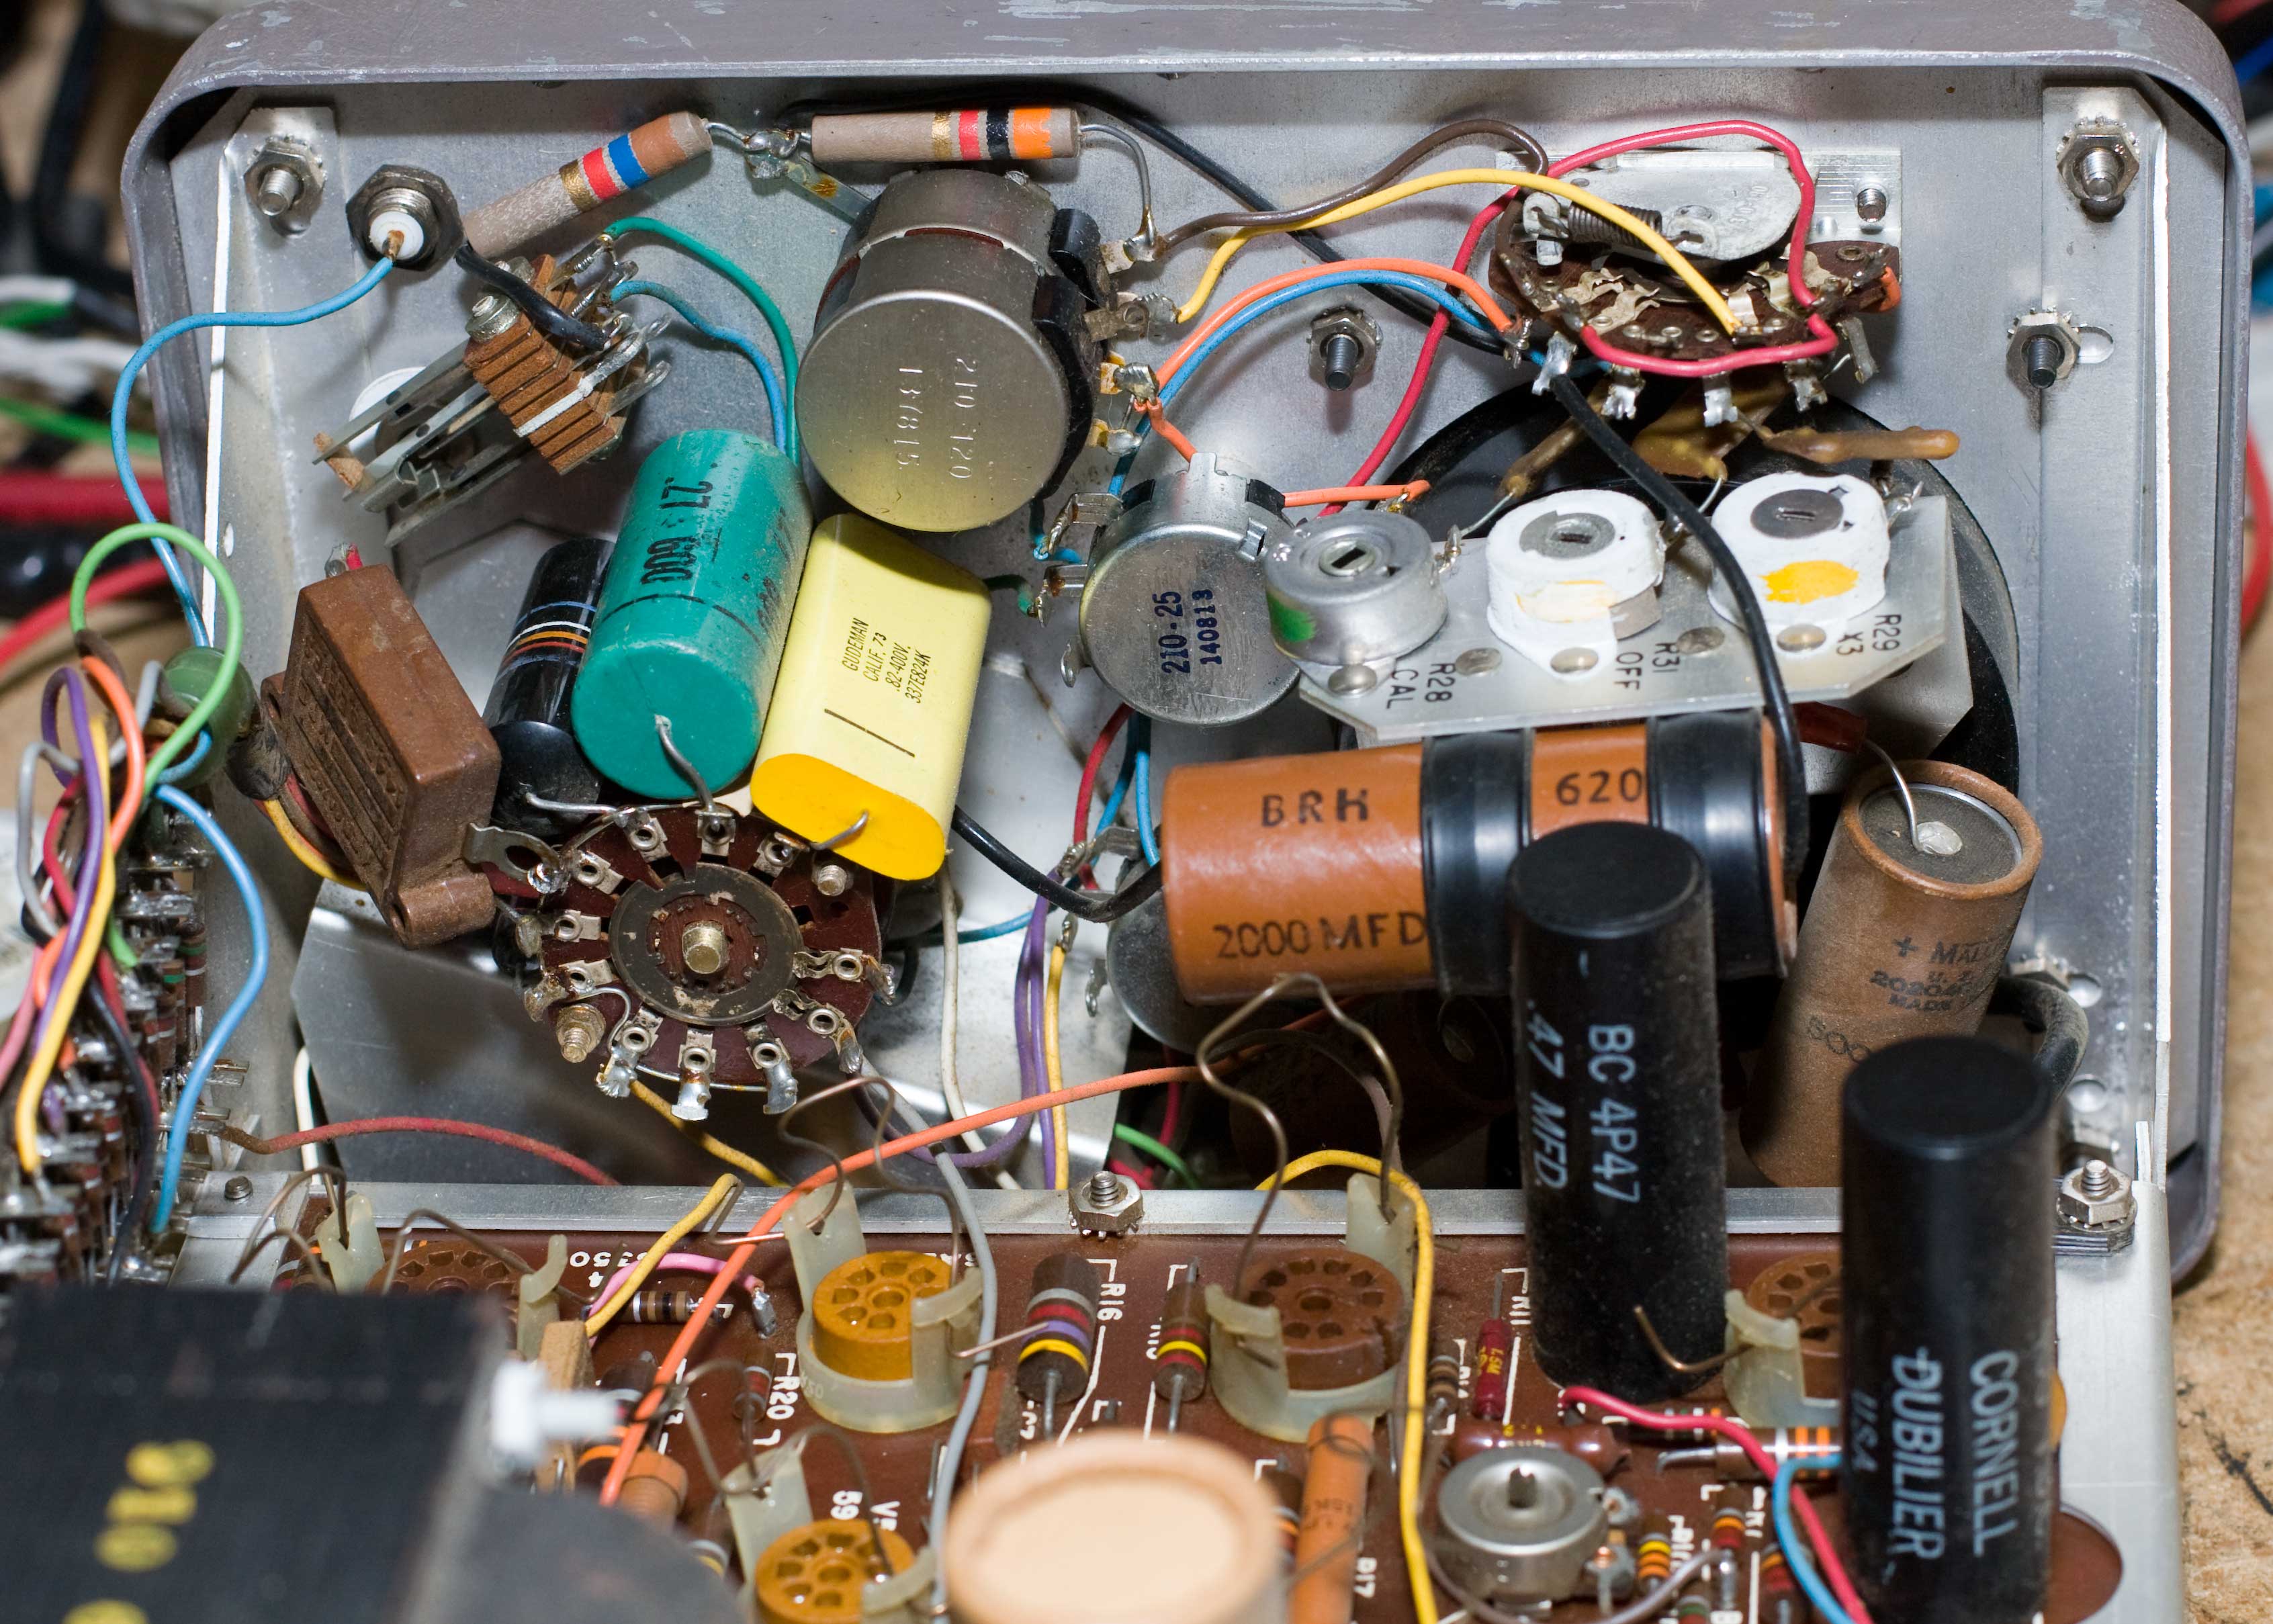
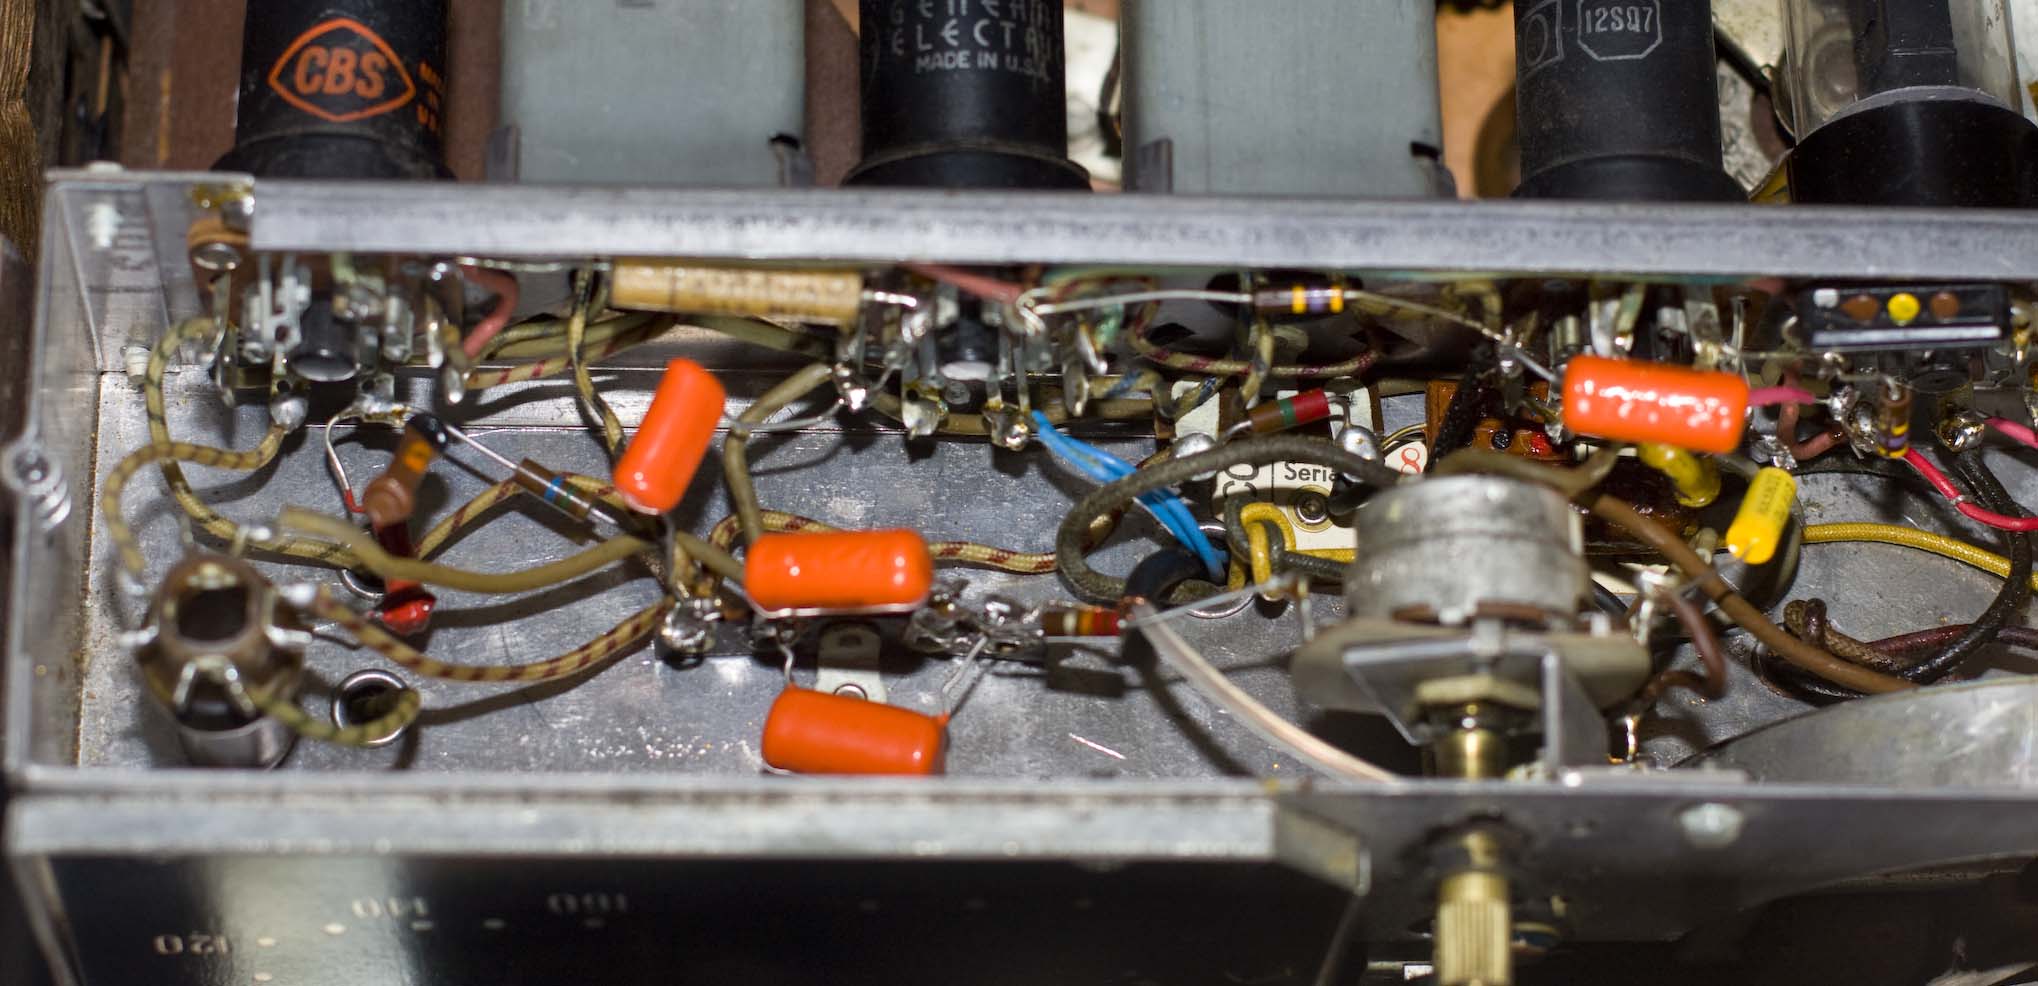
Caps
If I'm stalled on the tubes, I could at least look at the caps. I thought I'd replace the two line filter caps that sit on the primary of the AC power transformer. Thought I found them, soldered onto a piece that screws onto the chassis side. I undid it and swung it out where I could see. I took off the .01 and replaced it. Then I looked at the other one... that's not a .01, it's a fat .05. For fun I checked both with the Eico capacitance bridge I just got. The .01 tested badly but the .05 is fine. Well, it's an old wax covered paper monster, might as well replace it with a nice new yellow film or an orange drop.
Look through my drawer of .05s—I've got a bunch but they're all discs. How about my .047s? The same. Highest rating I've got is 100V. The one I pulled out is 600V. Not quite close enough.
So I'll put the first one back—except that I've clipped one of the leads so close to the body that the stub is unusable. I could do it in an emergency but this isn't. Learned a new lesson: never cut out a component until you already have its replacement sitting on the bench.
I'll have to wait until Monday to pick it up from the parts house.
Thought I'd at least try to clean up the panel. I'm out of Awesome. Windex is worthless on this. Metal polish doesn't seem to be doing anything. Warm soapy water isn't either. Best I could do was buff up the knobs a bit. So another thing that'll have to wait until I can come up with a better cleaner—something that won't take the lettering off along with the grime.
I think I'll go watch TV.
Cleaning
 Next day. I bought some Awesome and thought I'd try the front panel, which looks like it was splattered when someone kicked a spitoon. Everything took a tiny bit of grime off but nothing worked well: Aweseome, Windex, warm water with Dawn, hot water with Dawn, hot water with Borax, WD40, metal polish, Brasso, and 93% alcohol. I was eyeing the jug of acetone but picked up the naval jelly that as in front of it, and tried that instead.
So what I thought was grime must have been rust, because the naval jelly did the trick. And it didn't remove the paint, either. Pulled off all the knobs, spread naval jelly on it all over, then wiped it down with a damp rag until I felt it was reasonably clean and dry. If I weren't lazy I would have pulled off the panel and given it a clear coat of paint, but instead I went over it with Meguiar's car wax.
I went over the knobs with plastic polish and car wax (though not too much) and put them back on. The results aren't perfect but a damn sight better than when it came in.
Stuck
At the moment I'm stalled. Because I have to mail-order a lot of my supplies, I accumulate shopping lists and make the purchases when I have enough to justify the freight expense. I just put in an order for a raft of tubes which I need for several different things, and that blew my budget. I didn't realize when I placed the tube order that was I was nearly out of high voltage capacitors, which will have to come from another source (Justradios.com), or that I needed test lead cable (Mouser). So I'm waiting for the bank account to recharge much the way one waits for a rainbarrel to collect water. Until then, this damn thing is sitting in the middle of my bench.
Update 1: The IPOIO
For the nobody who's curious about my progress on this thing: tubes arrived (after some kerfluffle) and are in. I ordered capacitors and am currently waiting. In the meantime I finished off the last of the capacitors that I had on hand. Also an order from Mouser came: 25 feet of test lead wire. Nice stuff, too. The Chanalyst has a hard-wired ground cable. The strain-relief through the chassis is just a tongue of metal that's bent to hold it in place, so it was easy to cut out the old, rotten cable and replace it with this new one. I still have to replace the AC cord, though. The strain-relief for that one is a rubber collar and it's way too small to pull on to the new cord, even if I could get it off the old cord. What galls me now is that I know I've got some rubber strain-relief collars around here somewhere, but can't find them. Meantime I picked up some plastic ones but they're all too big and I don't want to ream out the hole to make one fit. I can't plug it in anyway until I finish recapping, so there's no real pressure to deal with the AC cord at this time.
Meanwhile: IPOIO. There's an article in the April 1952 issue of CQ magazine IPOIO by the late Liscum Diven (page 49). IPOIO stands for the innate perversity of inanimate objects. It's a cute article and I recommend it if you can find it. He suggests "the following rules should be thoroughly memorized:"
- Always endeavor to make things as inconvenient for yourself as possible.
- Assume that in whatever you are trying to do, the results will be exactly the opposite of what you expect.
- The solution to any problem will be the one you wish it wasn't.
In my case it works like this: I went through the Chanalyst chassis and figured out which caps I still need to replace, and put in my order. It's important to note that there's a $20 minimum, and another $10 shipping at least, so any order I place will be $30 minimum.
So I made up my order and sent it in, and I know it's been acknowledged, picked and shipped. So today I see another cap I hadn't seen before: a .01 at 2000V! Two thousand volts! I can't get that at Fry's. Don't know if I can get it from the "local" parts house but I doubt it. But the guy I just ordered from has them—75¢ each.
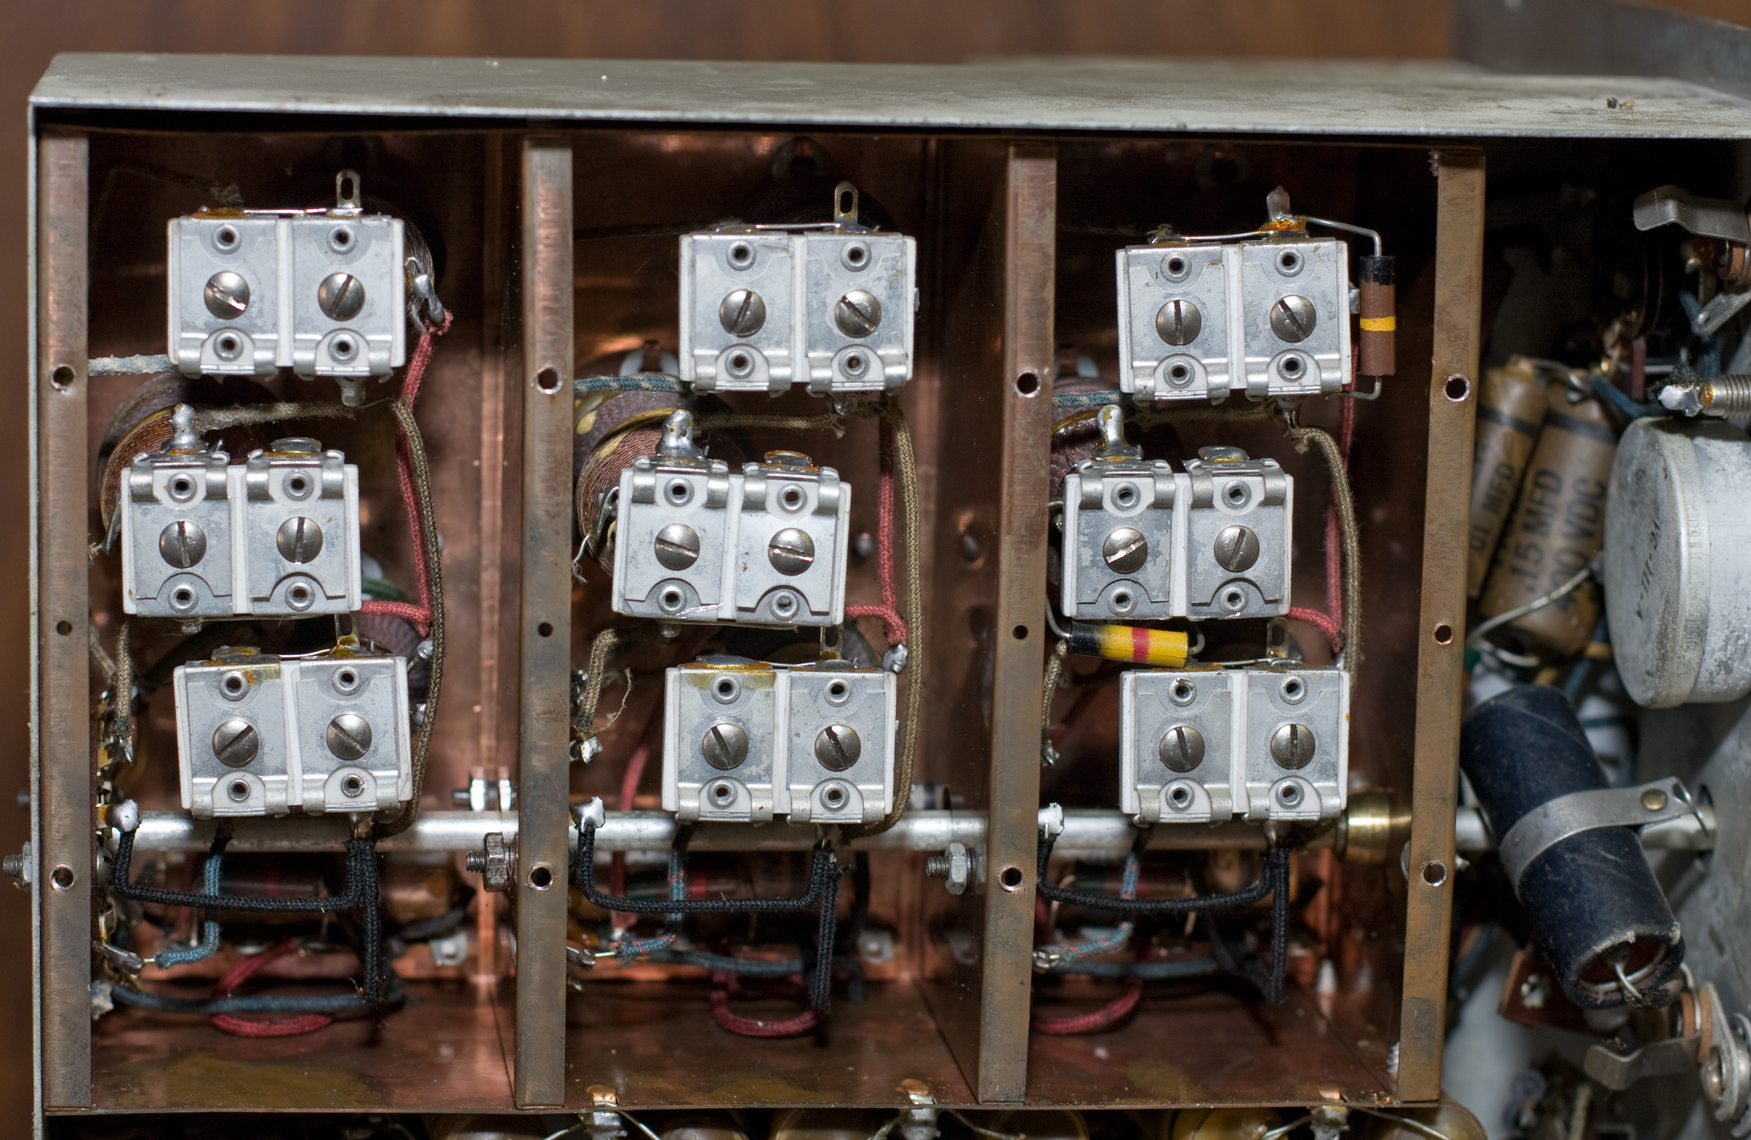
SO the capacitors arrived. I cleared out the row of paper .01s. Then I finally got in and pulled out the three final caps that are on the front switch. I couldn't get them all the way out so there was a lot of digging and wiggling and swearing. Managed to get the big .15 out, the one I couldn't find anywhere and was the main reason I mail-ordered. Replaced the .01. Then I finally snipped out the final .01 and made the mistake of looking at it—it was a .015.
I had a bunch of .015s—they're all 100V orange drops with short leads. I need another 400V (or better) with long leads. I could have made due with short leads but not the voltage.
So tomorrow I get to make the rounds of the electronics parts houses (as few and far between as they are) and hope someone has it. Otherwise I'm going to be stuck for another week waiting for one capacitor. The AC cord is back on. So I'm literally waiting for this one piece.
Oh yeah—tomorrow's a holiday and Sunday everyone's closed anyway. So I'll be waiting a week regardless.
To quote Jean Shepherd,
Oh well, it doesn't matter. It only gets worse. But the thing you got to keep saying to yourself is that it gets worse for everybody, simultaneously, all of the time. Maybe.
—73 Magazine, December 1963; reprinted October 1980 and June 1986
Done
I ended up making a what I needed by wiring two caps together.
The caps were in. I fired it up and it worked. No smoke. No arcing. The wattmeter reads suspicously low on radios but was pretty close when I tried out the Webcor tape recorder (90 watts). I'll take another look at it later. But in the meantime, the other channels all seem to work. I ran a long wire to the RF channel input, patched the RF out to the AF channel input, and the AF channel out to the infamous Wards stereo/8-track via the AUX input, and tuned in KFI. I can't explain the mix of triumph and foolishness of spending all this time, energy and money to take a piece of commercial test equipment and make it pick up a local AM broadcast station. But there it is. I'm done. Let's get the can-opener and see what's inside something else. . . .
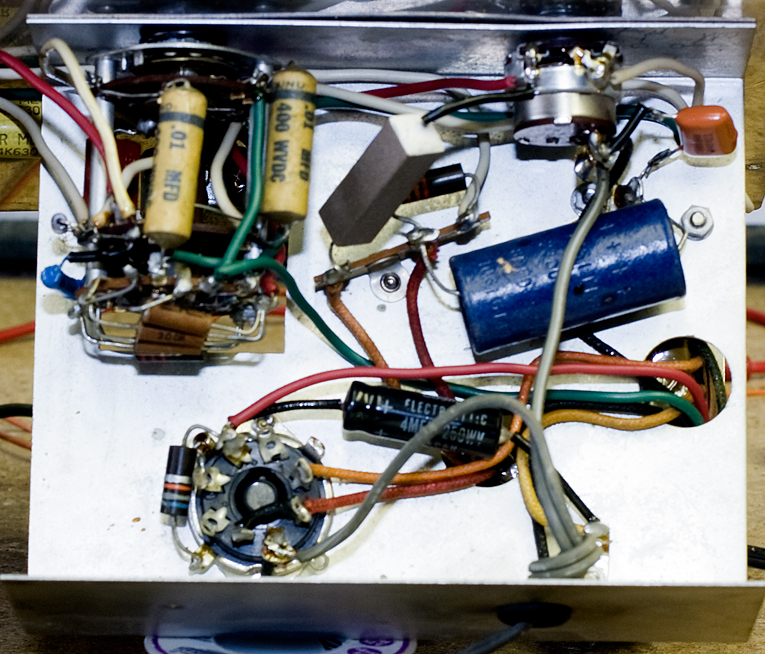
EICO 950B Resistance-Capacitance-Comparator Bridge
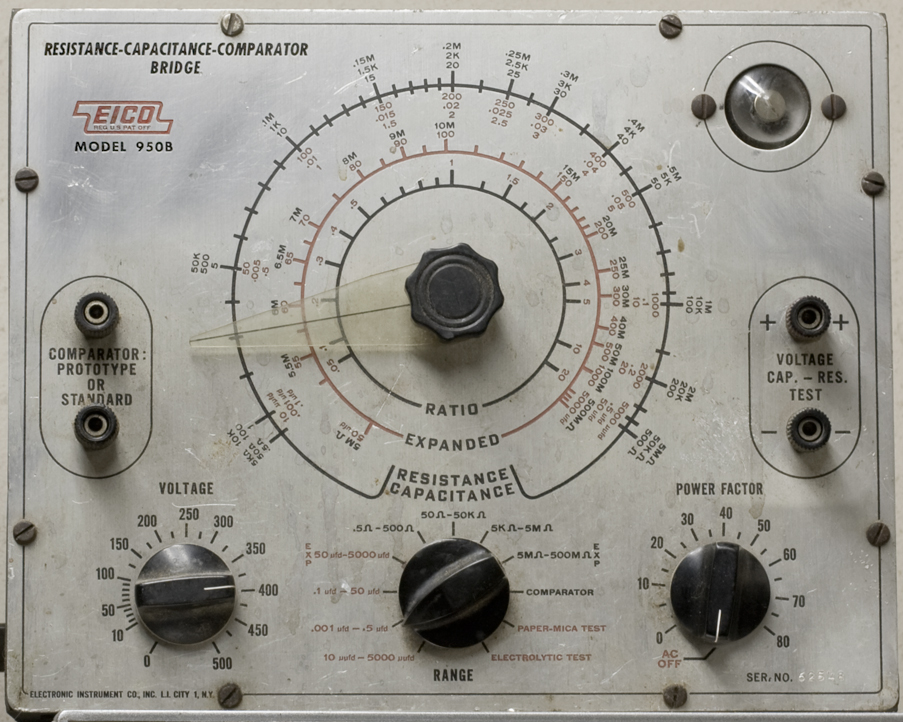 One of the more frustrating pieces of equipment I own. I want this thing to work because I like the idea of being able to test leaky capacitors, but every time I touch it I get shocked, and then when I think I've fixed it, it never seems to solve the problem for long. I keep getting zapped (albiet not badly) even when it's off. I hate chassis/cabinet-grounded equipment.
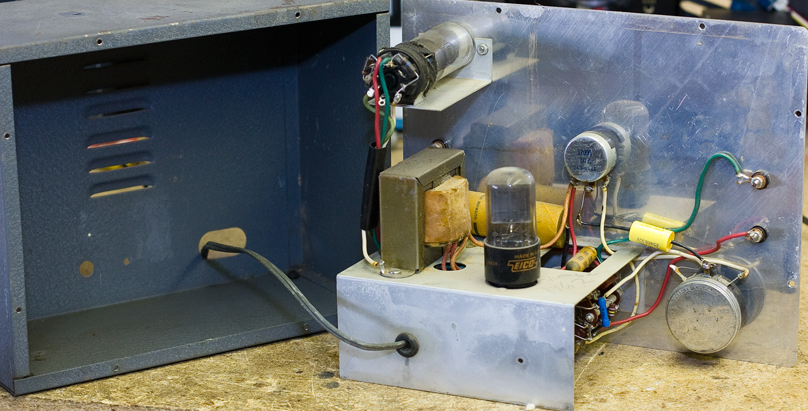 So here it is inside. As you can see there isn't much to it. BAMA has the book for it, but it's in dejavu format. I've copied it into PDF format if anyone wants it. BAMA also has the construction manual, for what that's worth.
There's not much to it, really. Two tubes, one 1629 magic eye tube and a 6X5 rectifier (the one branded EICO here).
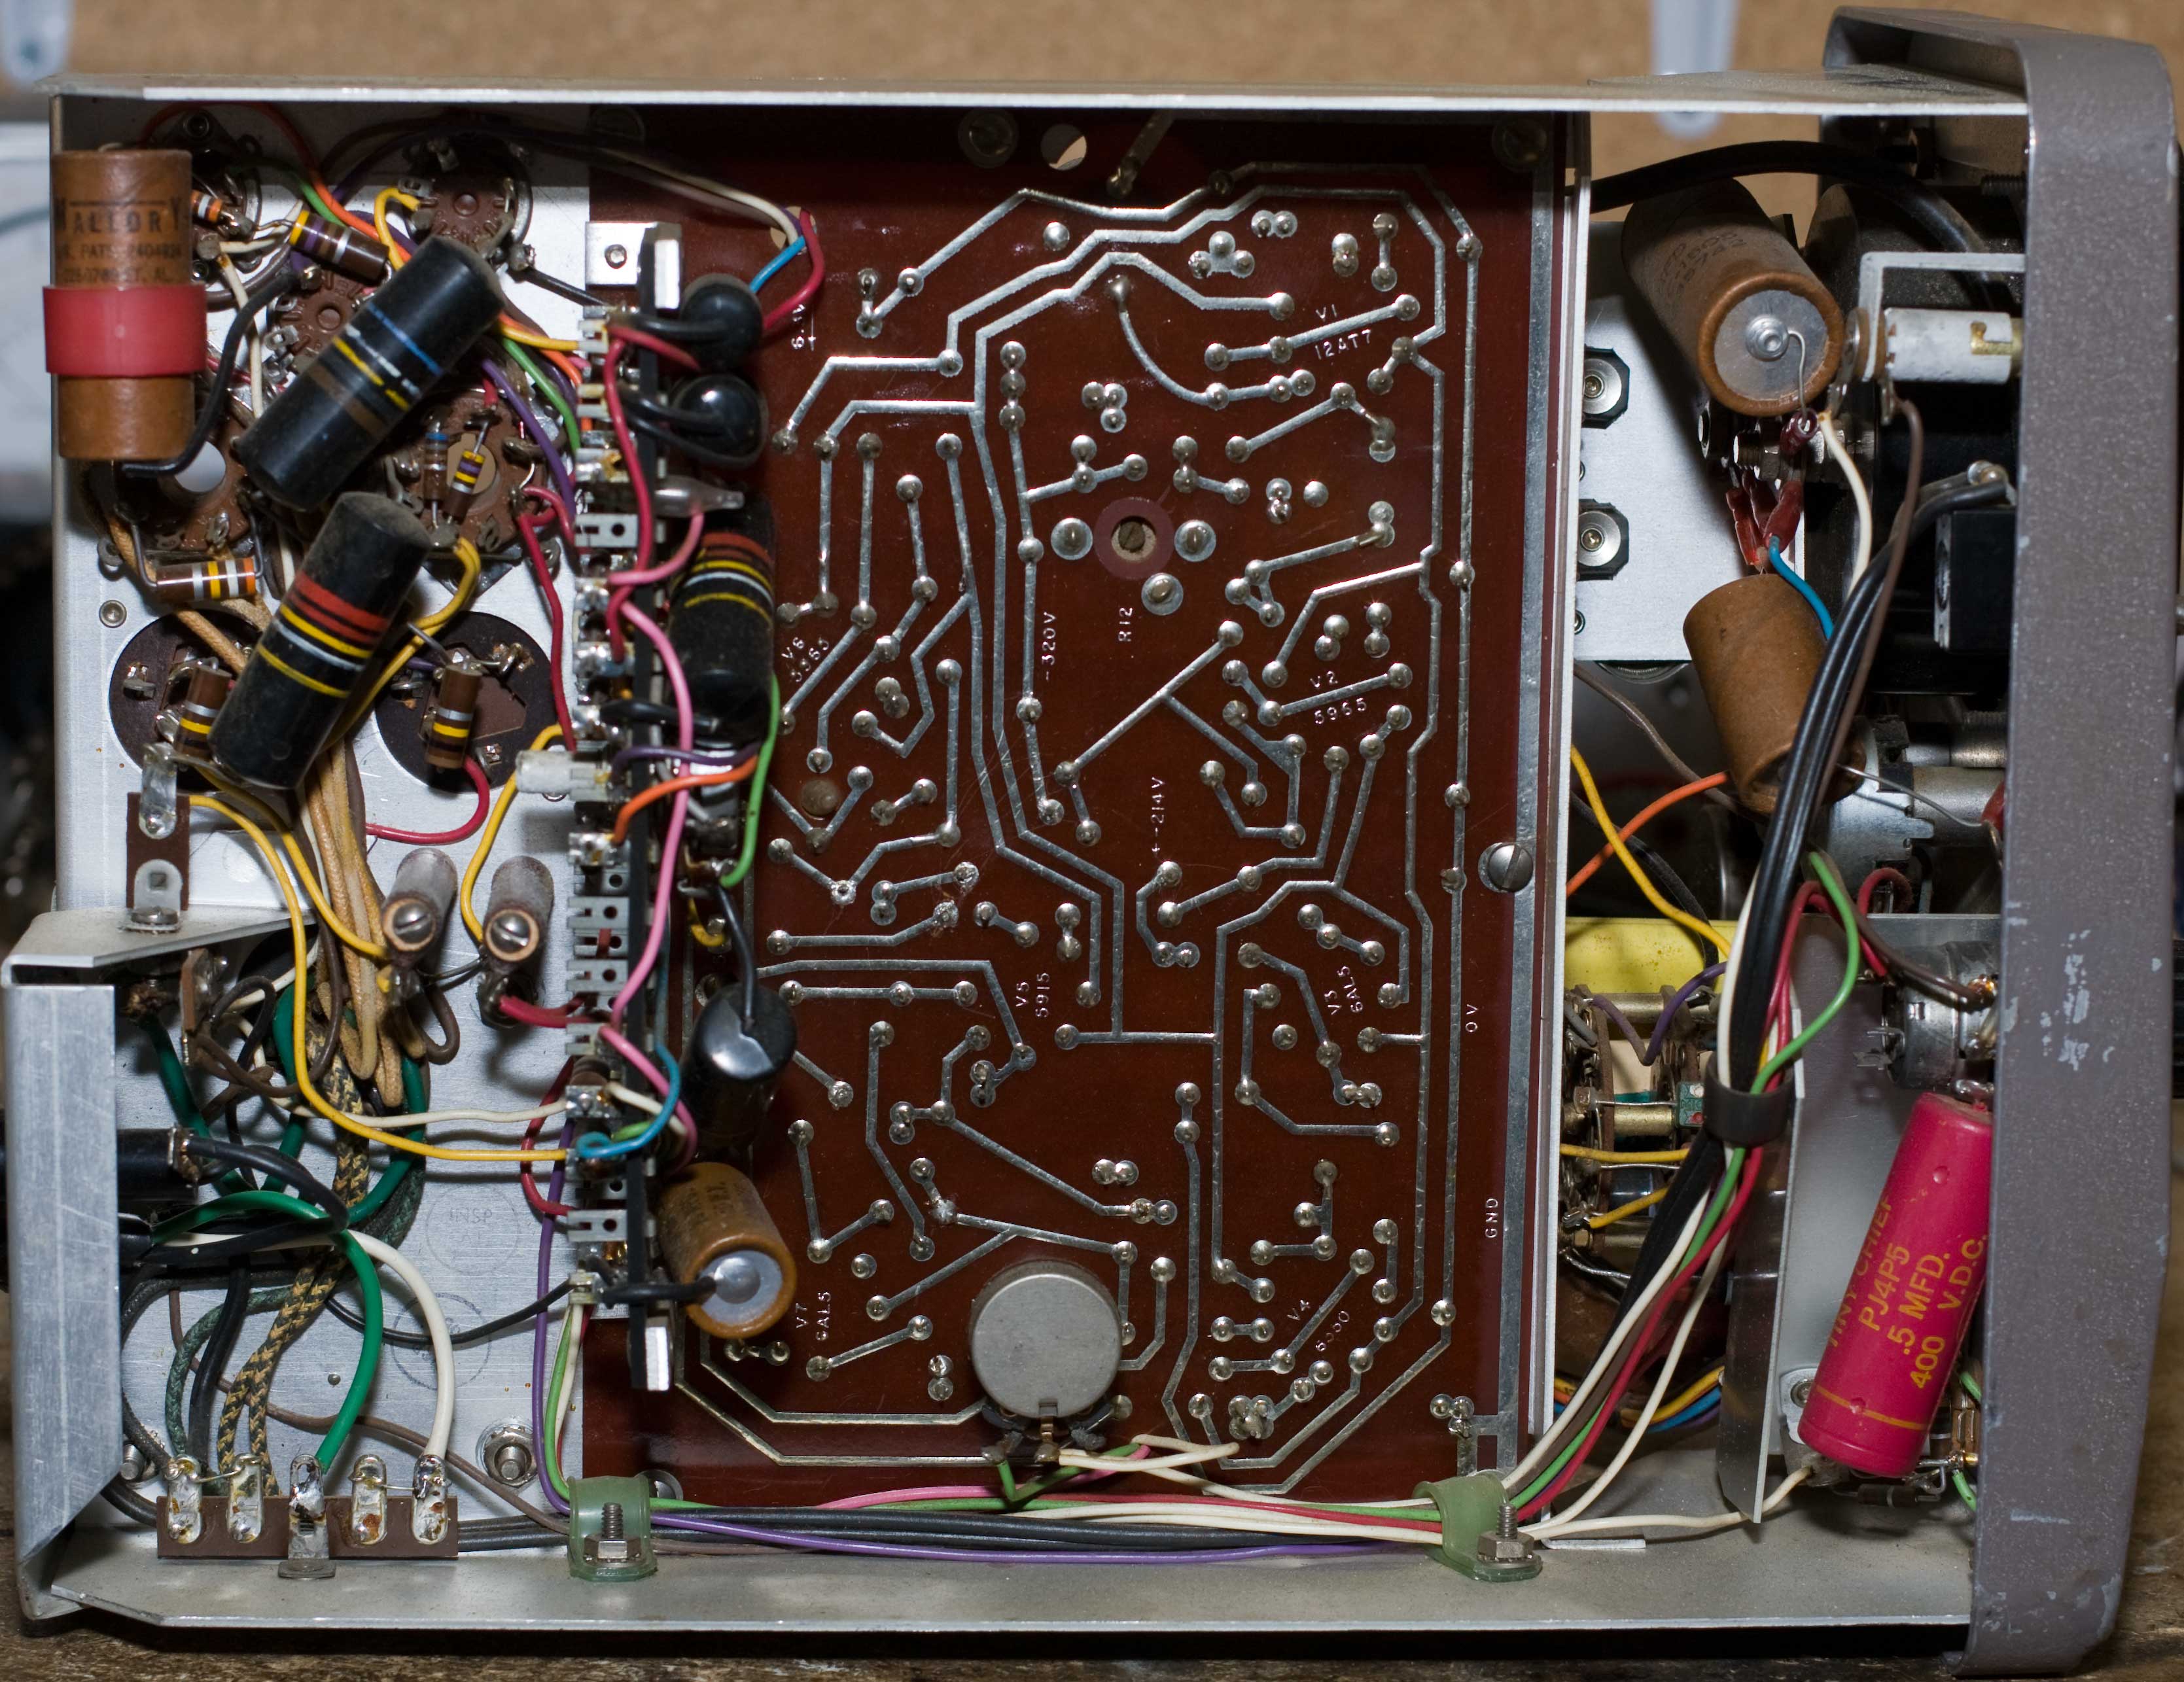
Hewlett-Packard 500B Frequency Meter
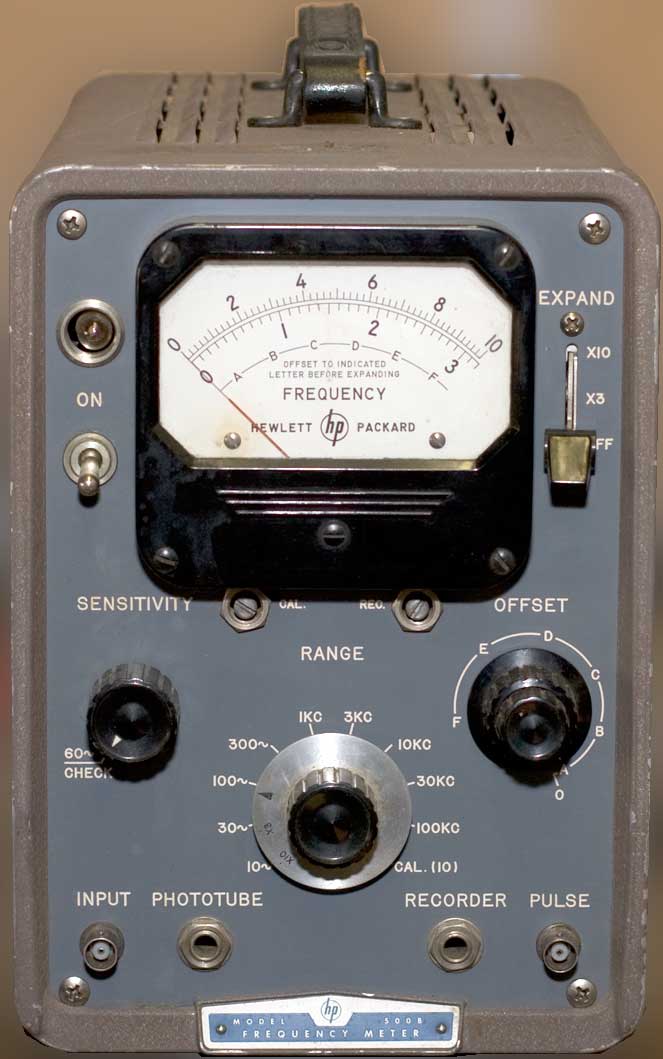 FYI: I no longer have this in my collection.
This is not an actual teardown; I was waiting until I have all the tubes and then I would do it all at once. But it only takes two screws to pull the cover, so I opened it up to take photos.

Zenith 5R086 Radio/Phonograph
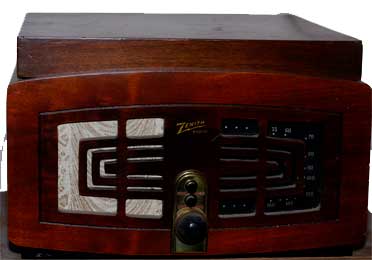
I did not take photos the last time I'd had my 5R086 open, so when I was asked a question about something on the chassis, I opened it up and this time I had the camera ready.
Click on any image to make it larger (if available.)
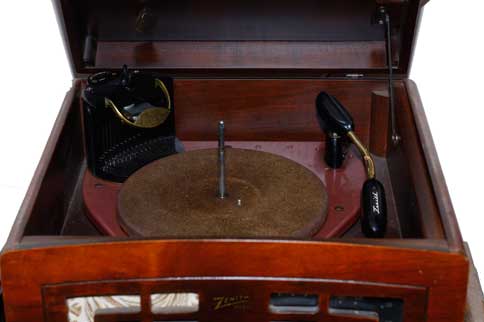
This is what we're starting with: a tabletop radio/phono combination. The changer (yes, it's a changer, not a turntable) is 78 rpm only.
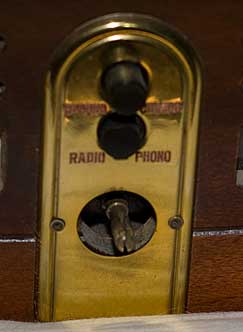
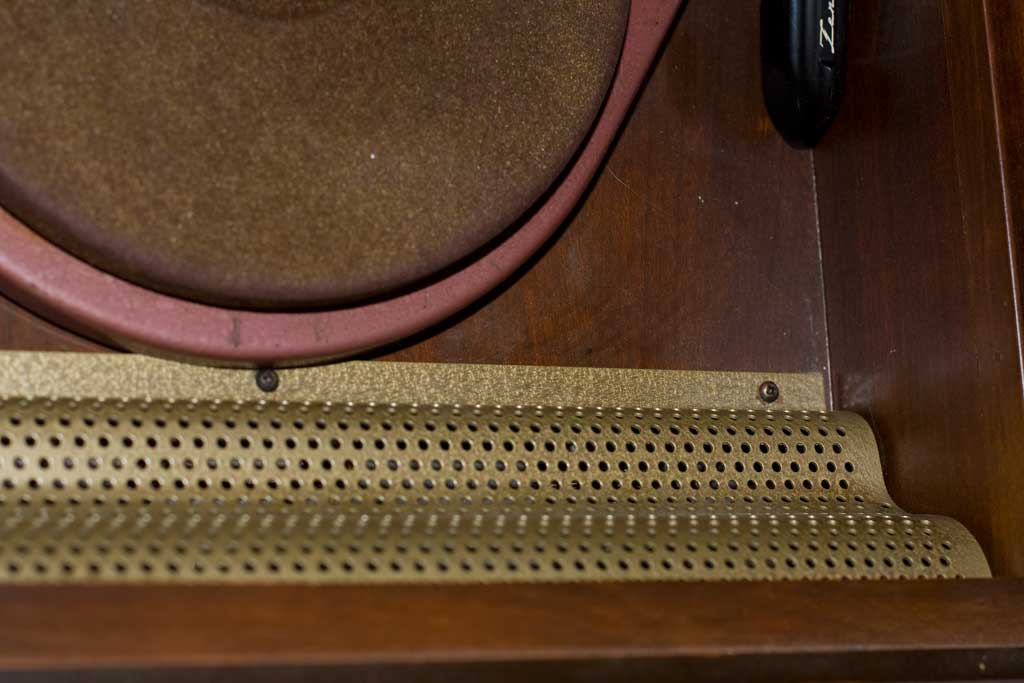
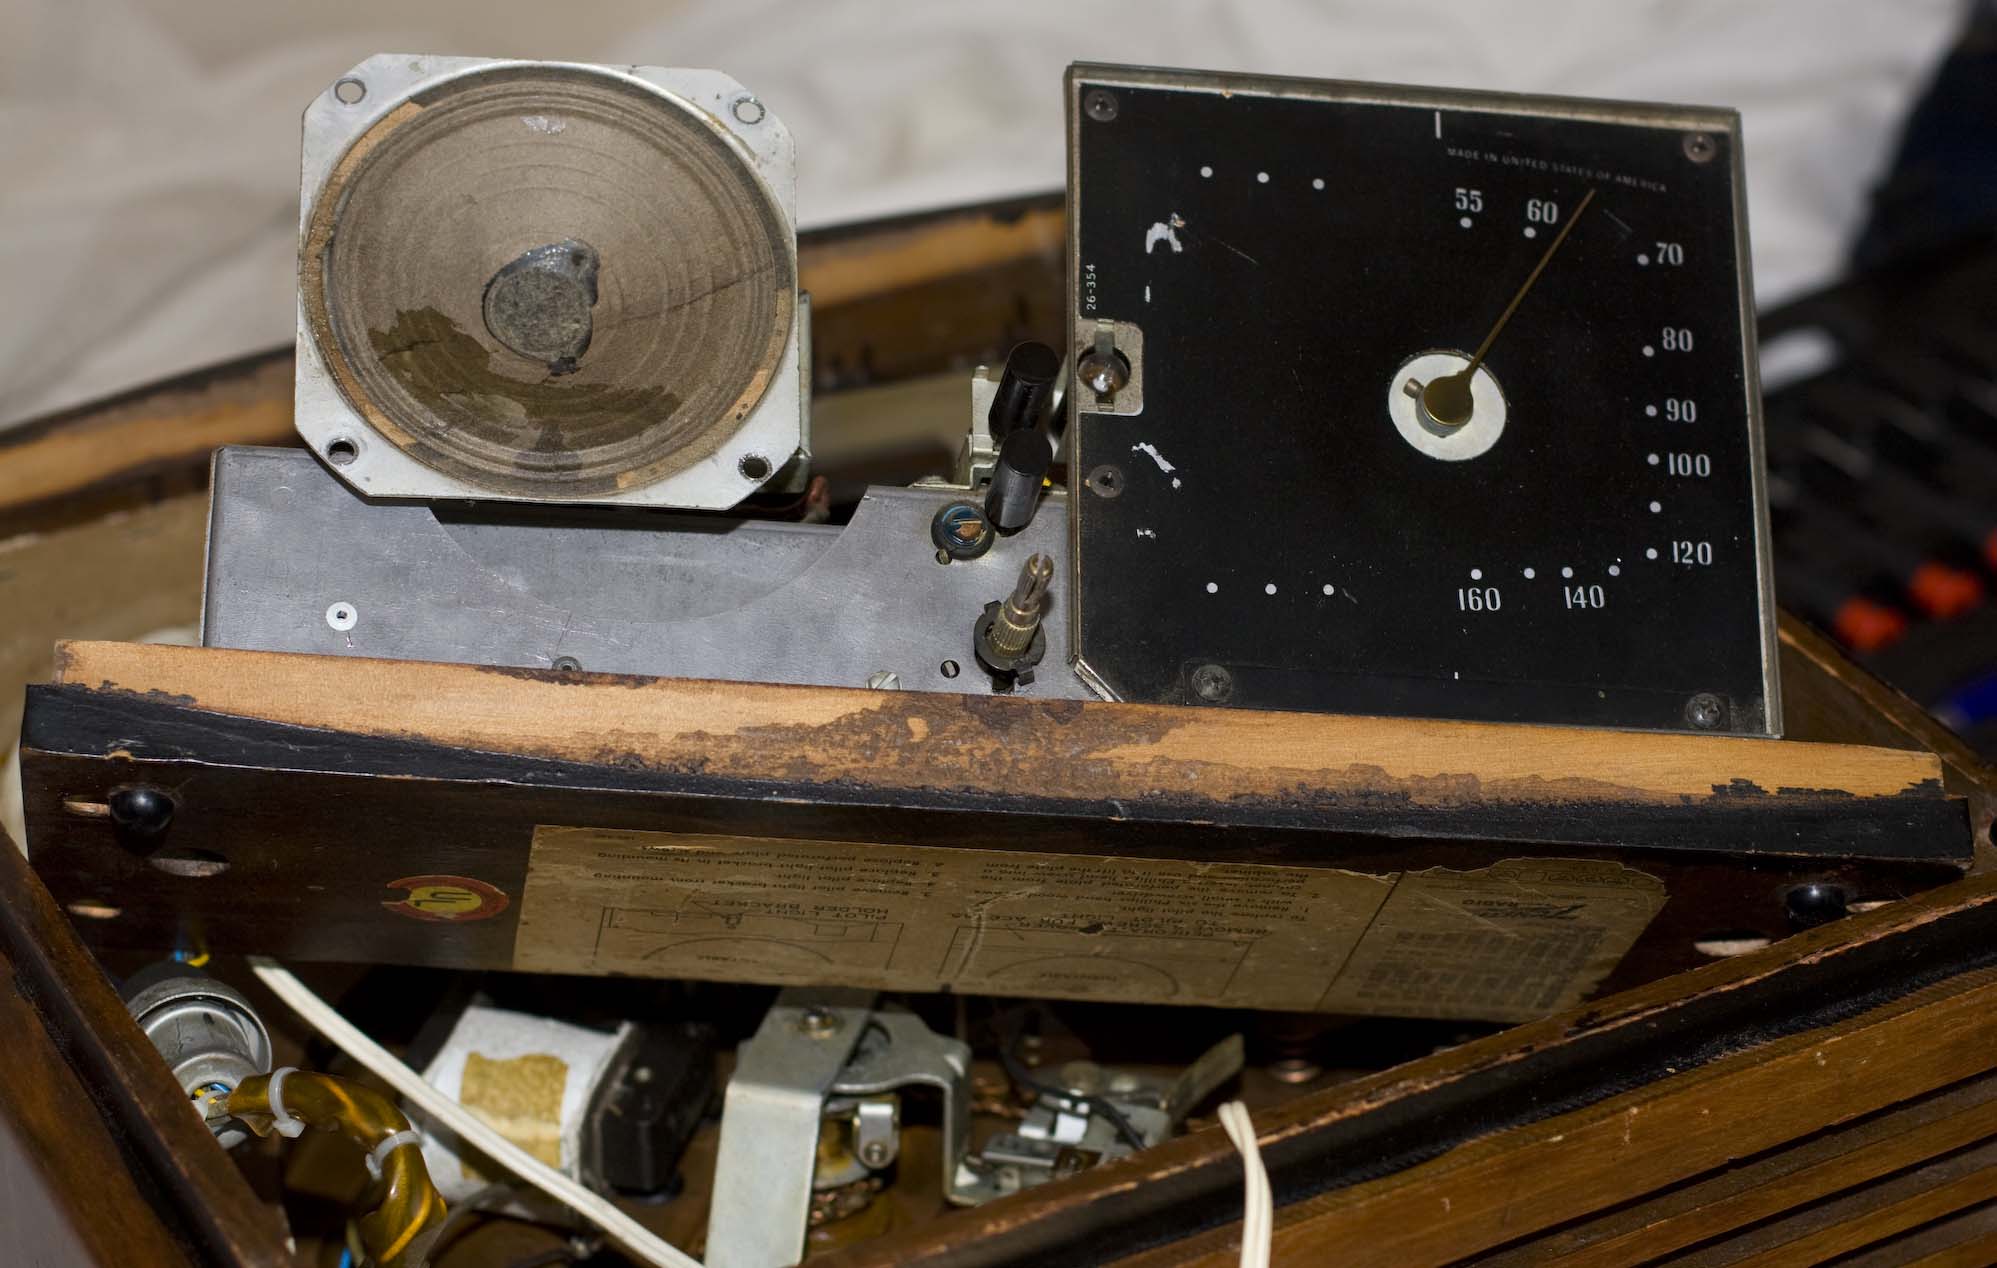
Top left: the front face with the knobs removed. They pull off easily.
Top right: lid lifted, you can see a green metal grille. There are six screws holding it in. You don't have to remove it, but if you do (bottom center), it gives you access to the tuning capacitor, the front switches, and the speaker.
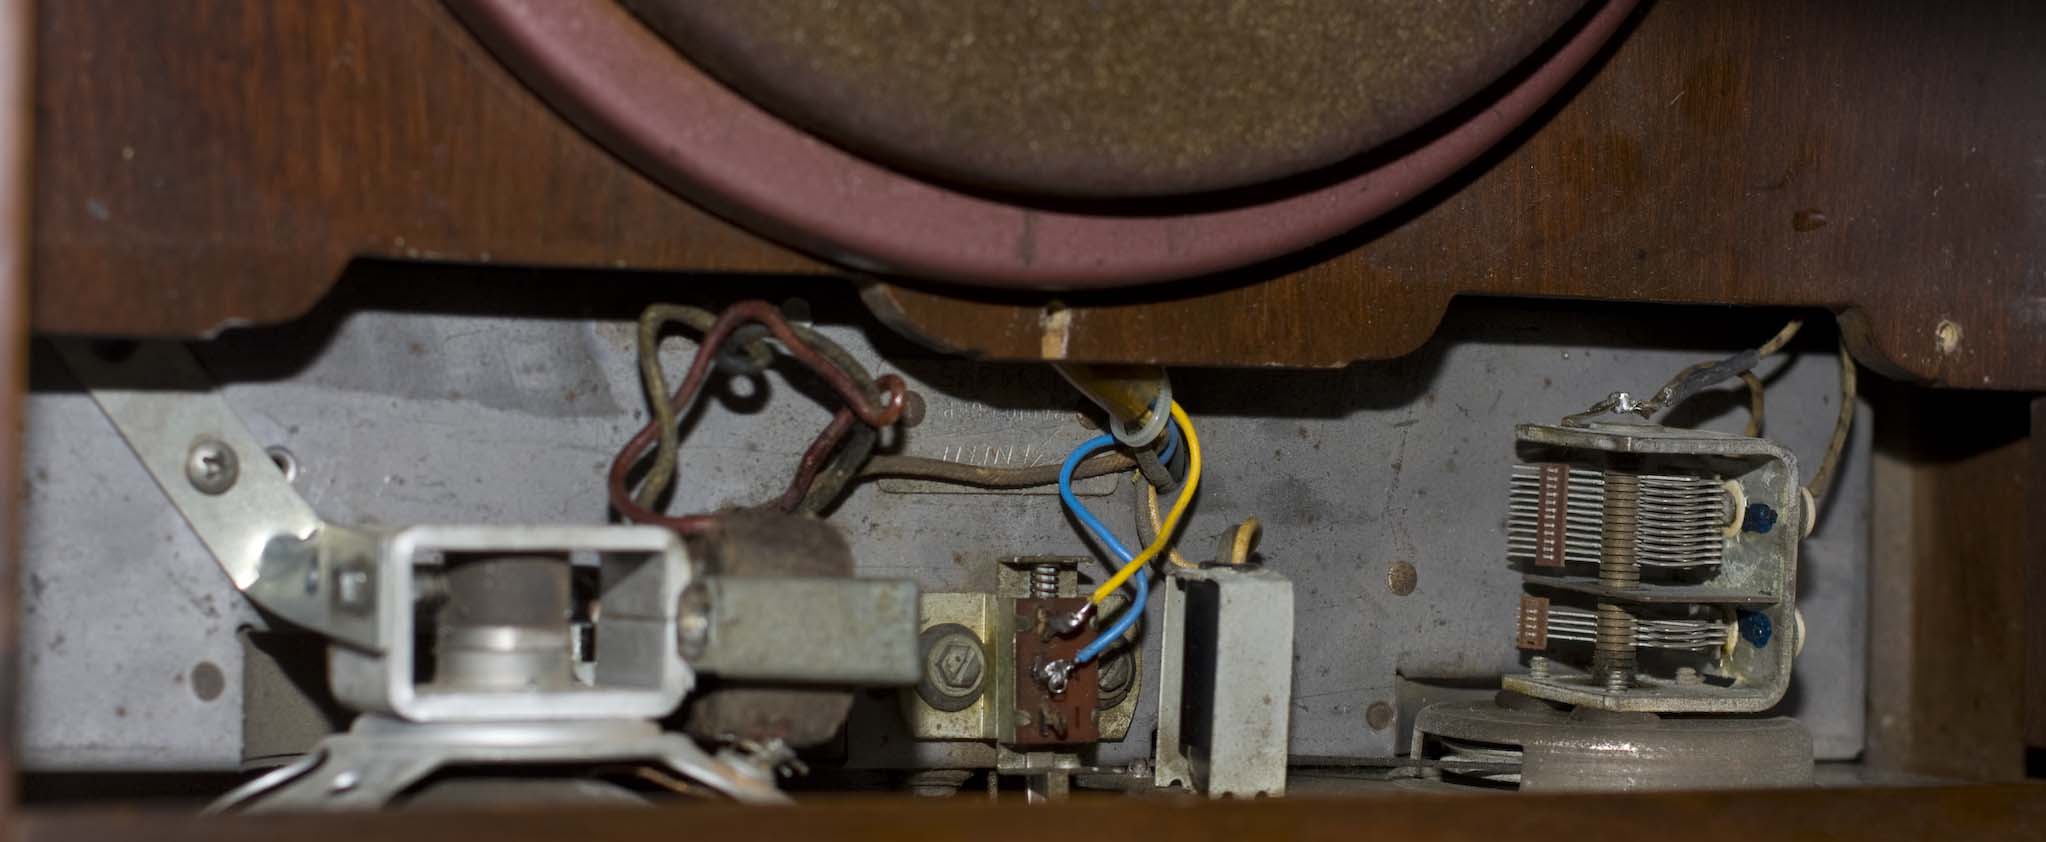
Upper left: underside of the cabinet: this is the phono motor and mechanism.
Upper right: underside of the cabinet: the radio/amplifier chassis is bolted underneath this cross-board: you can see the tubes and IF coil cans exposed. You take the four slot-head screws out to pull the board. Once that's done, you take the two ¼-inch hex-head screws to get to the chassis.
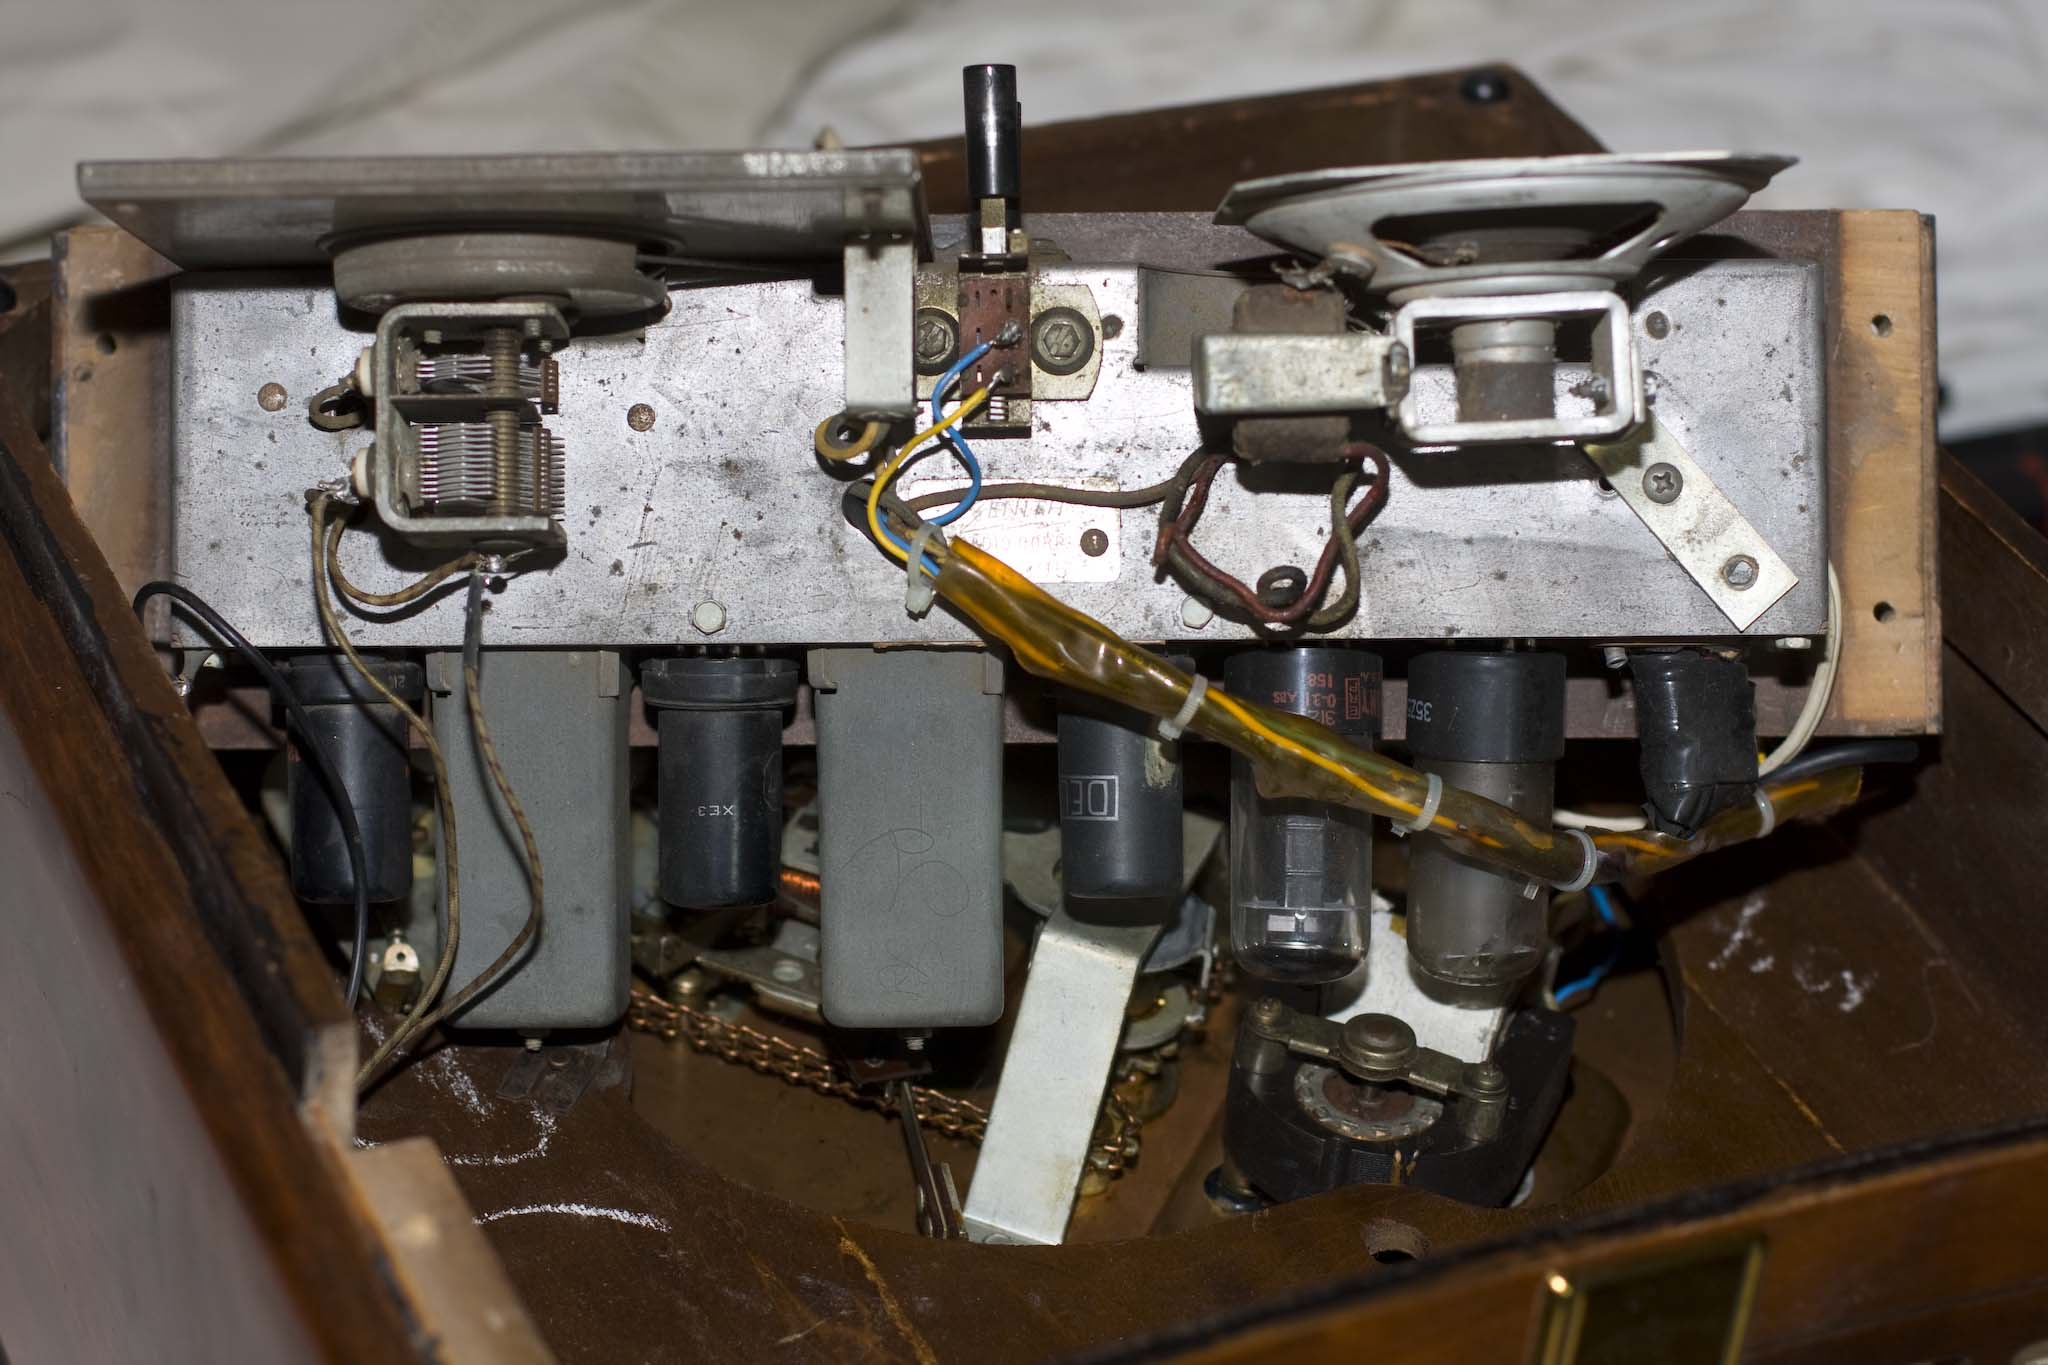
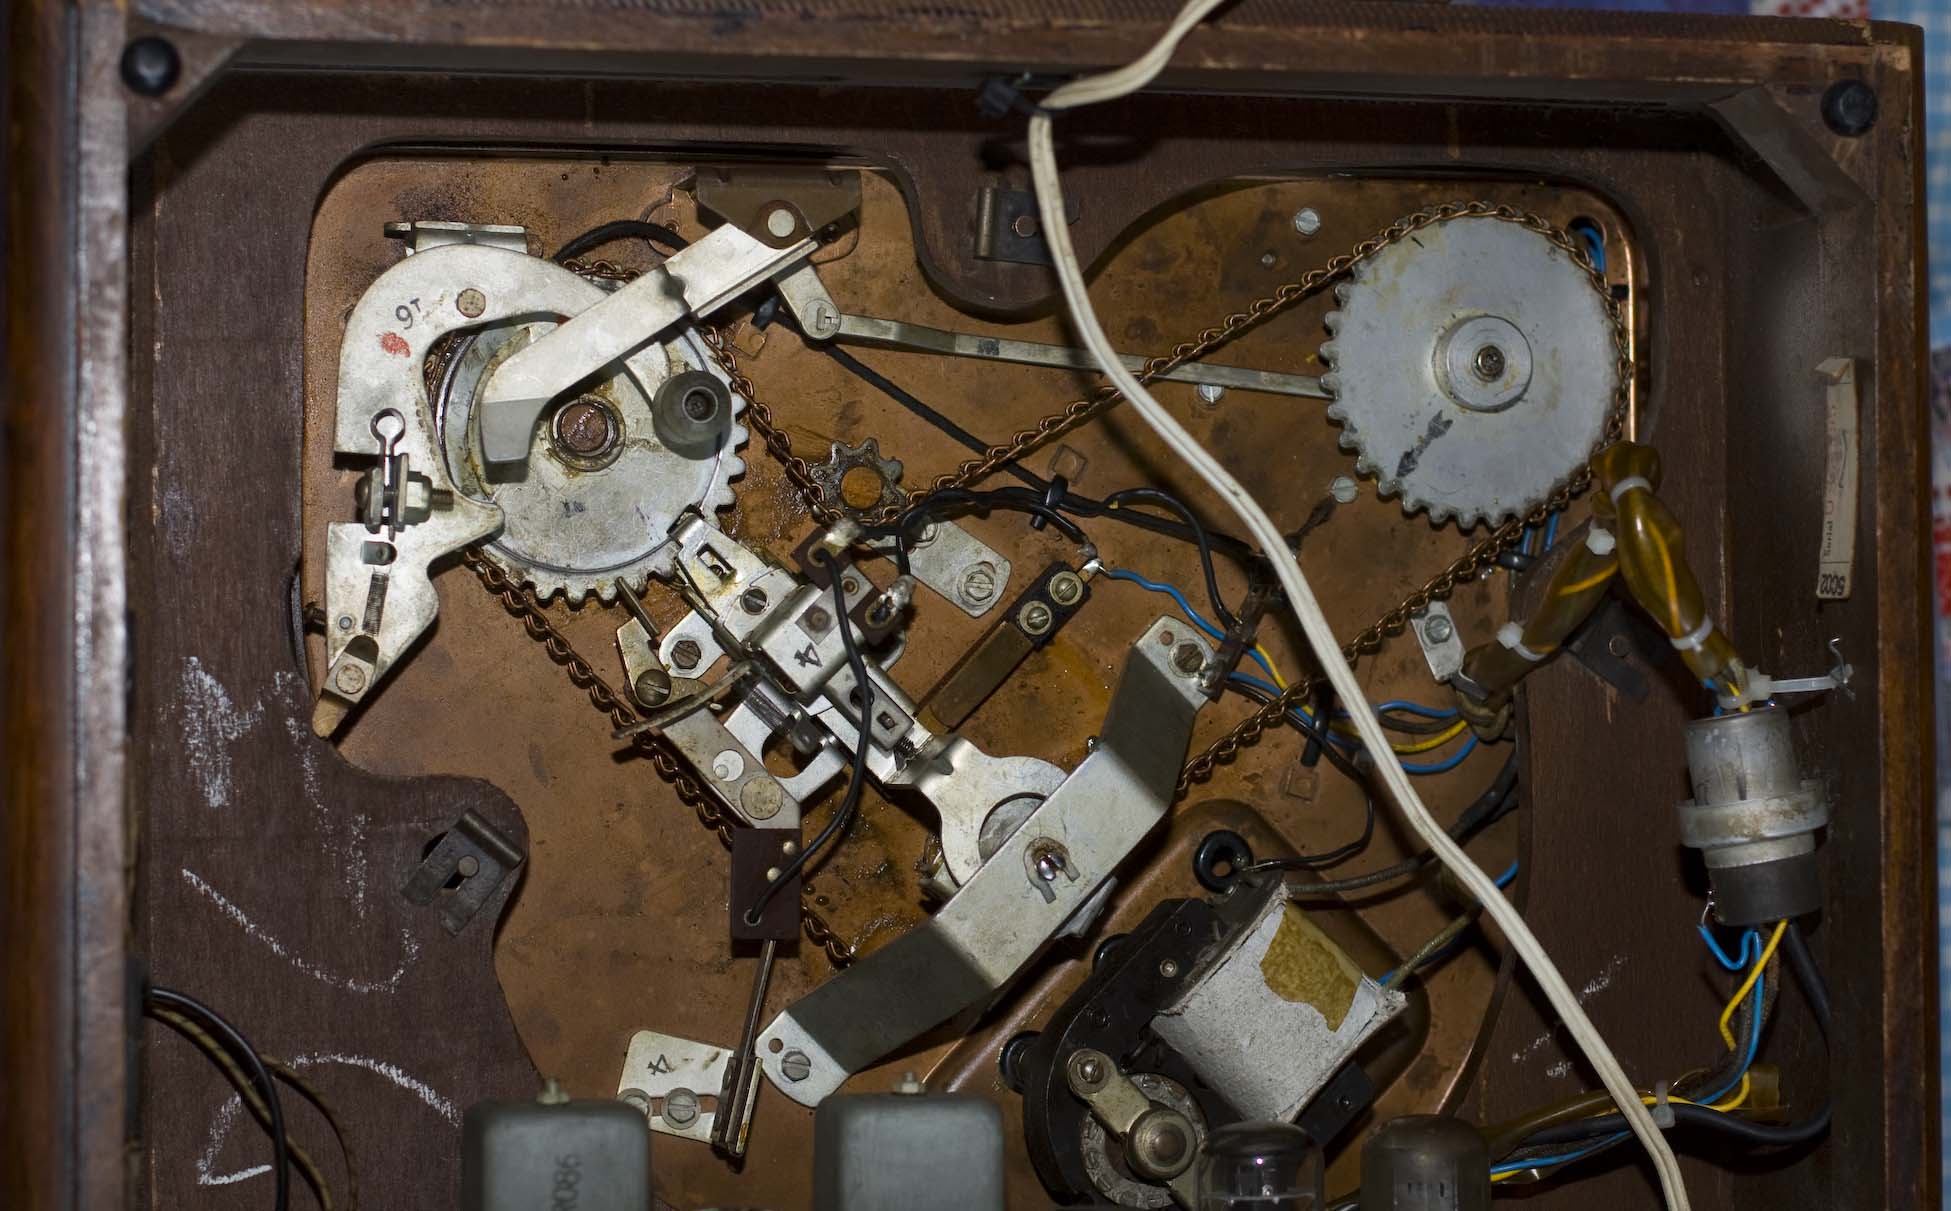
Upper left: the four screws removed so the chassis is exposed. You can see the front and can get to the dial.
Upper right: the bottom of the chassis, with a bit more room to work.

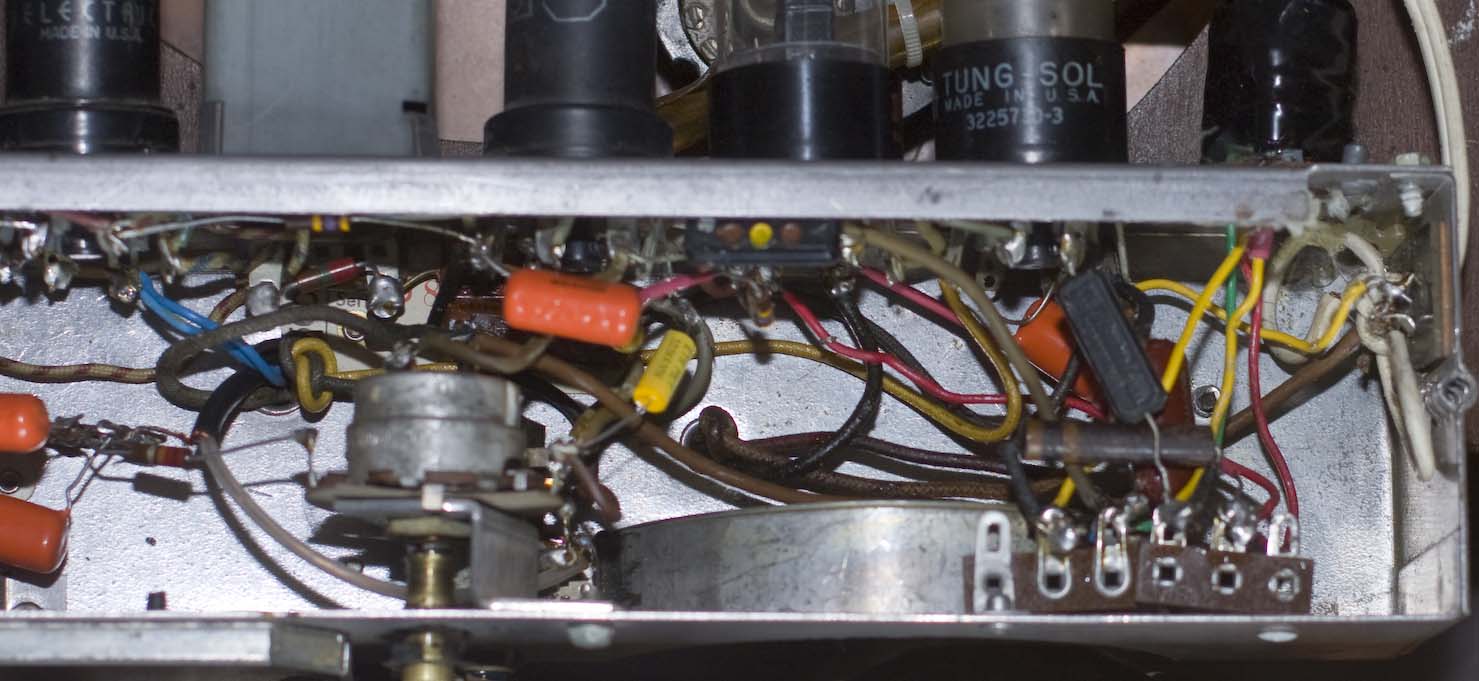
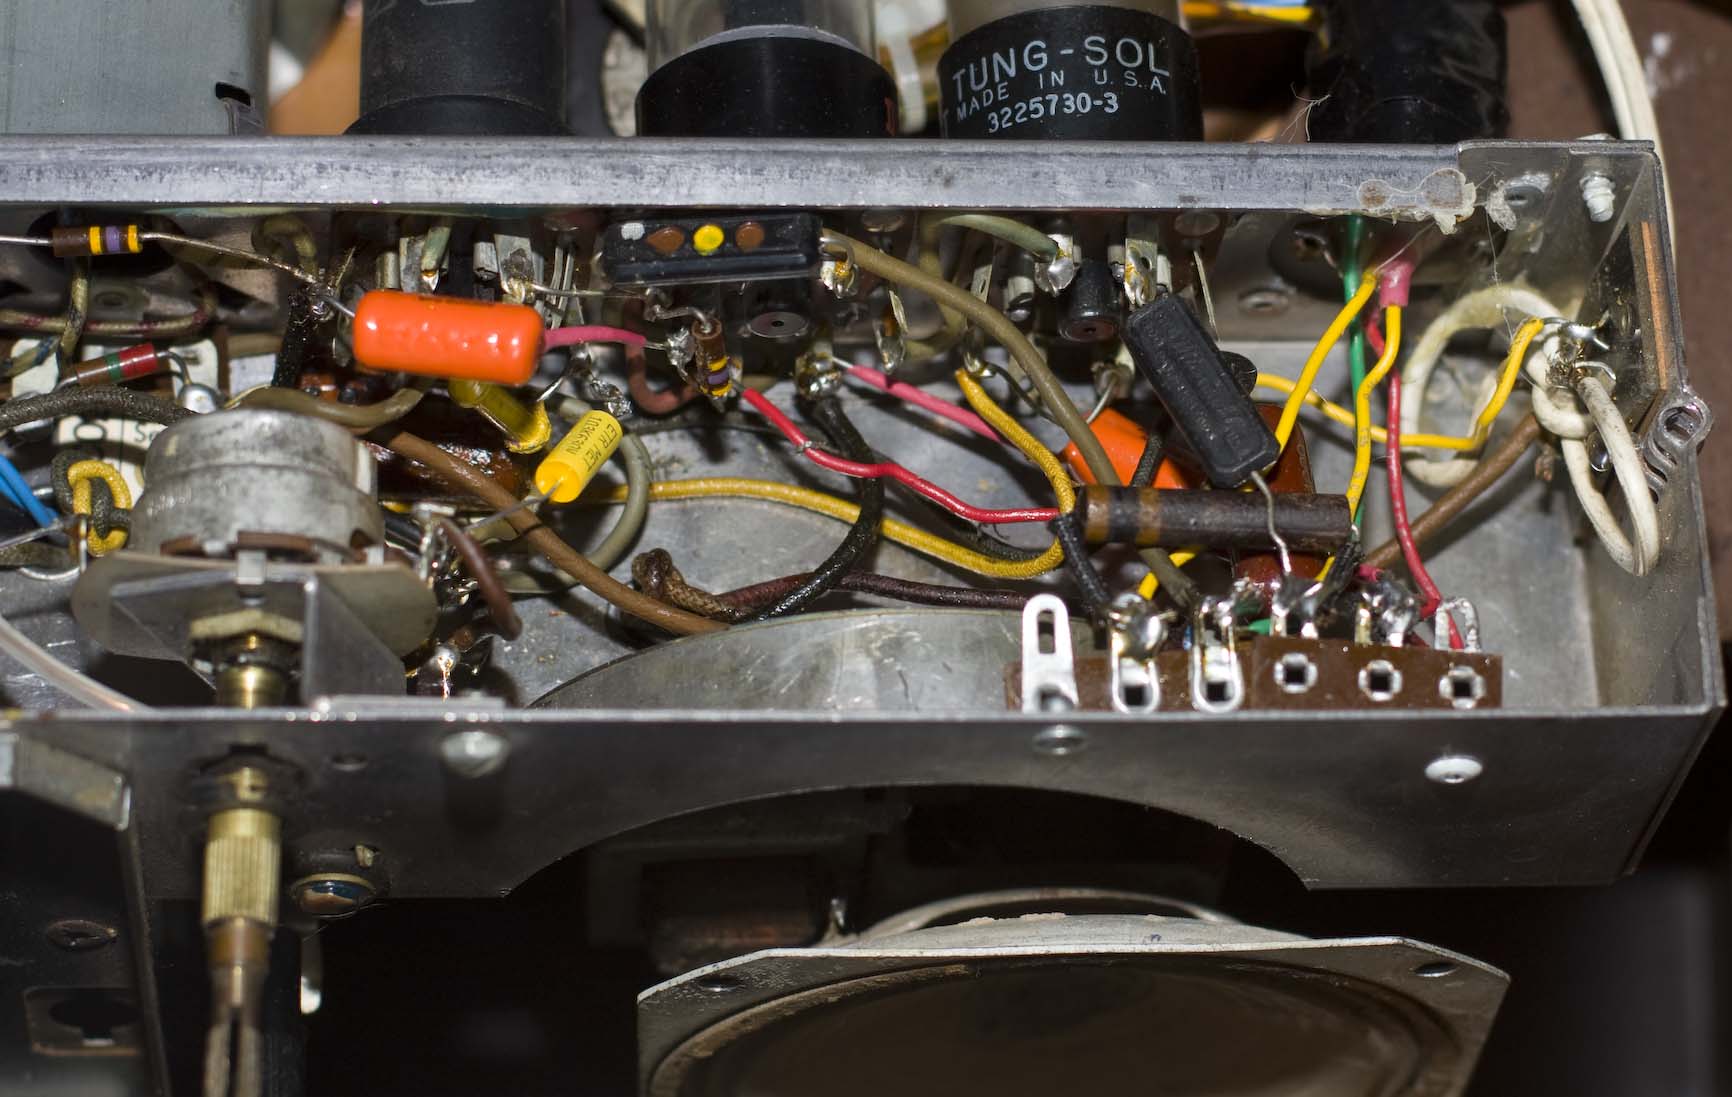
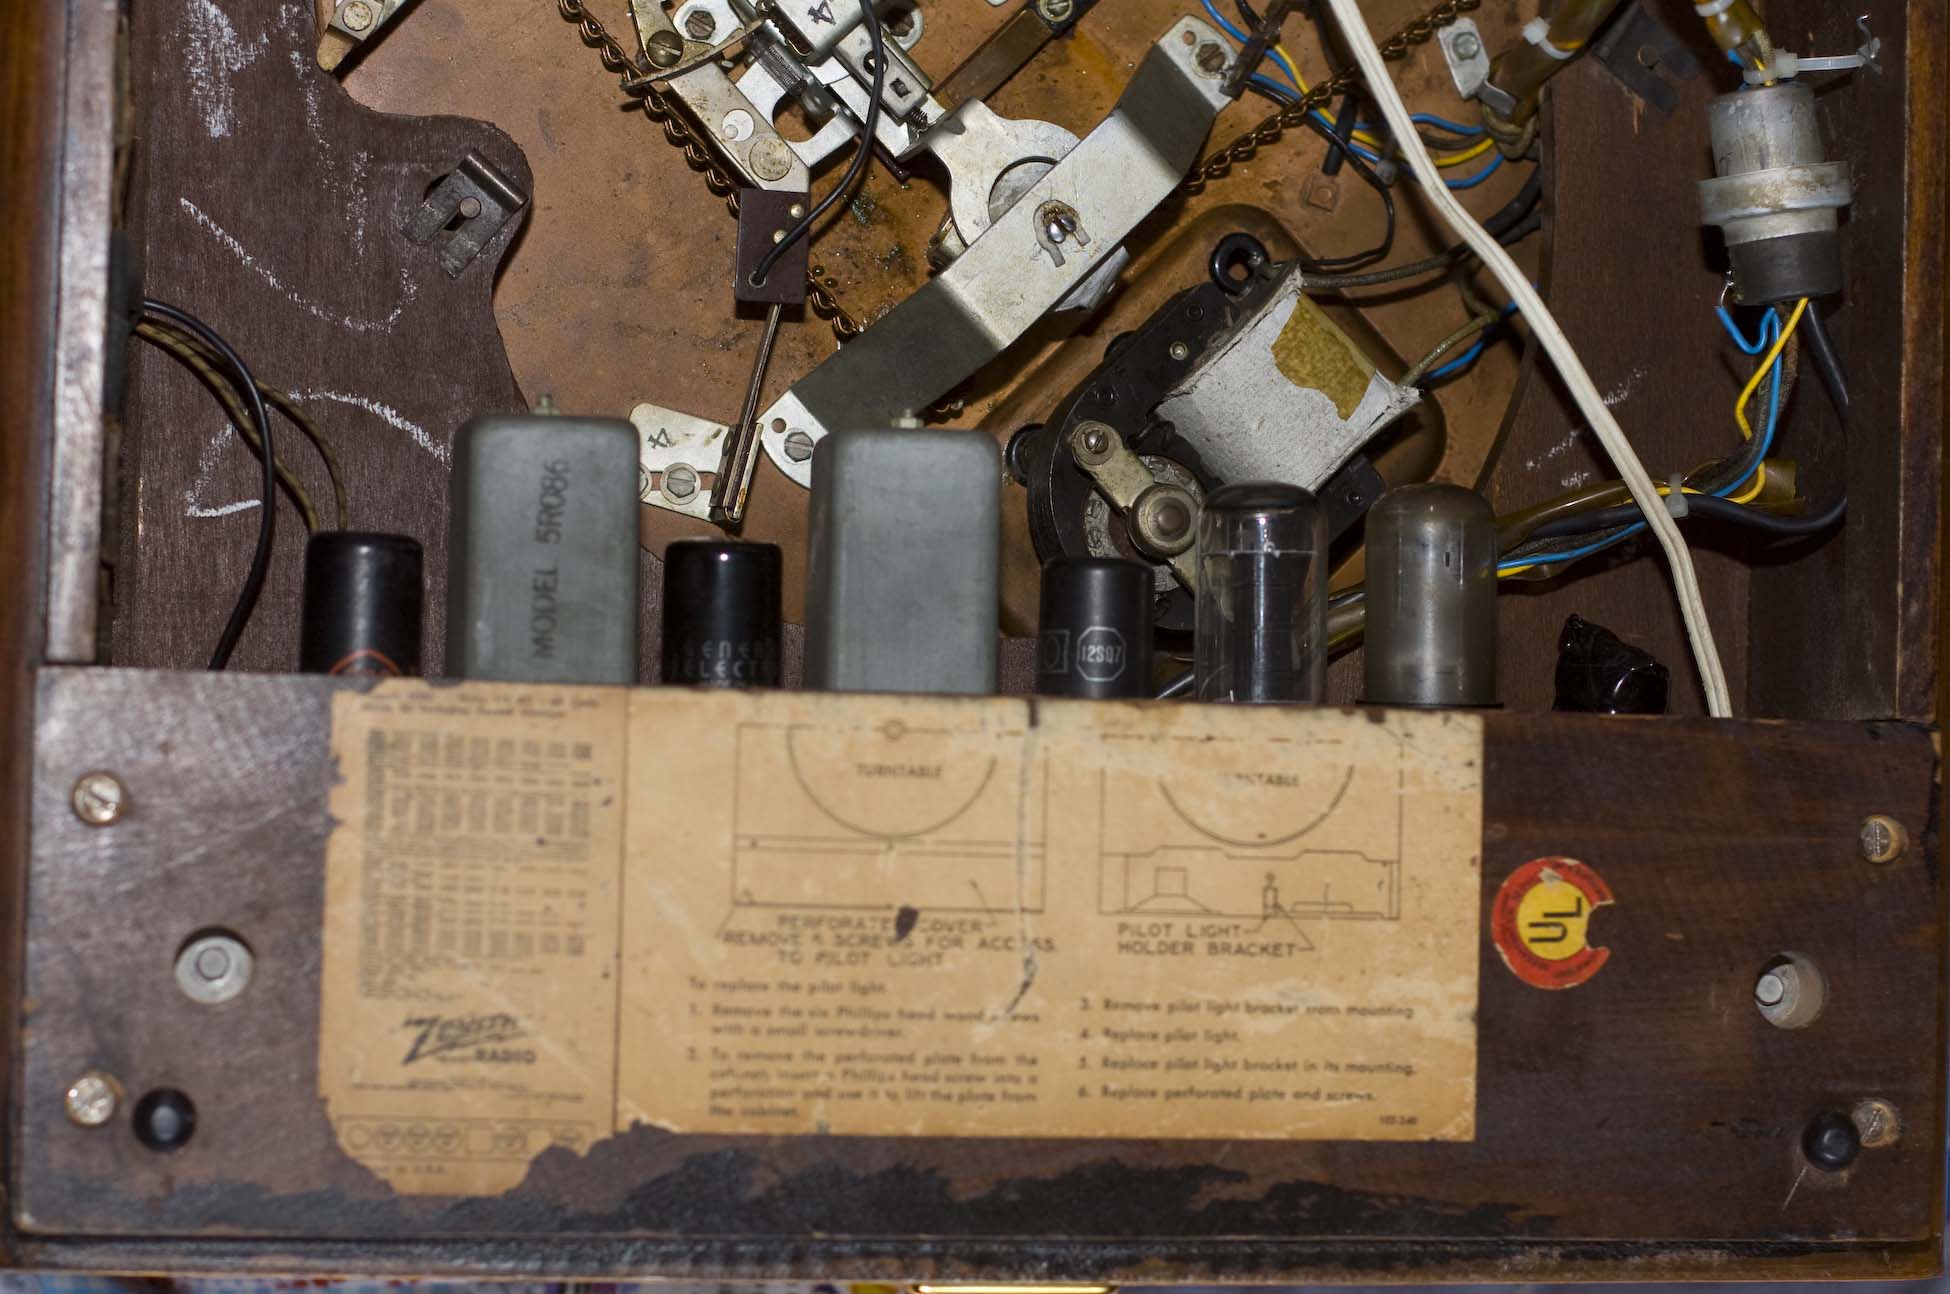
Upper images (both rows): With the two hex-head screws off you can remove the board and gain access to the underside of the chassis. As you can see there's not a lot to it. I replaced the old paper caps with modern orange drops and they don't take up so much room, so the whole thing looks a bit more open and less crowded than it would have originally.
It's hard to see, but at the right side of the chassis (as seen here), the filter capacitor can sits up with the tubes. The original can was no good; at that time I wasn't attempting to save the can for cosmetics: I just replaced the caps with modern electrolytics and wrapped them with electrical tape reduce the chance of a short just in case.
So that's it. It's really just an AA5 piggy-backed onto a record player.
Dumont Oscillograph Type 245

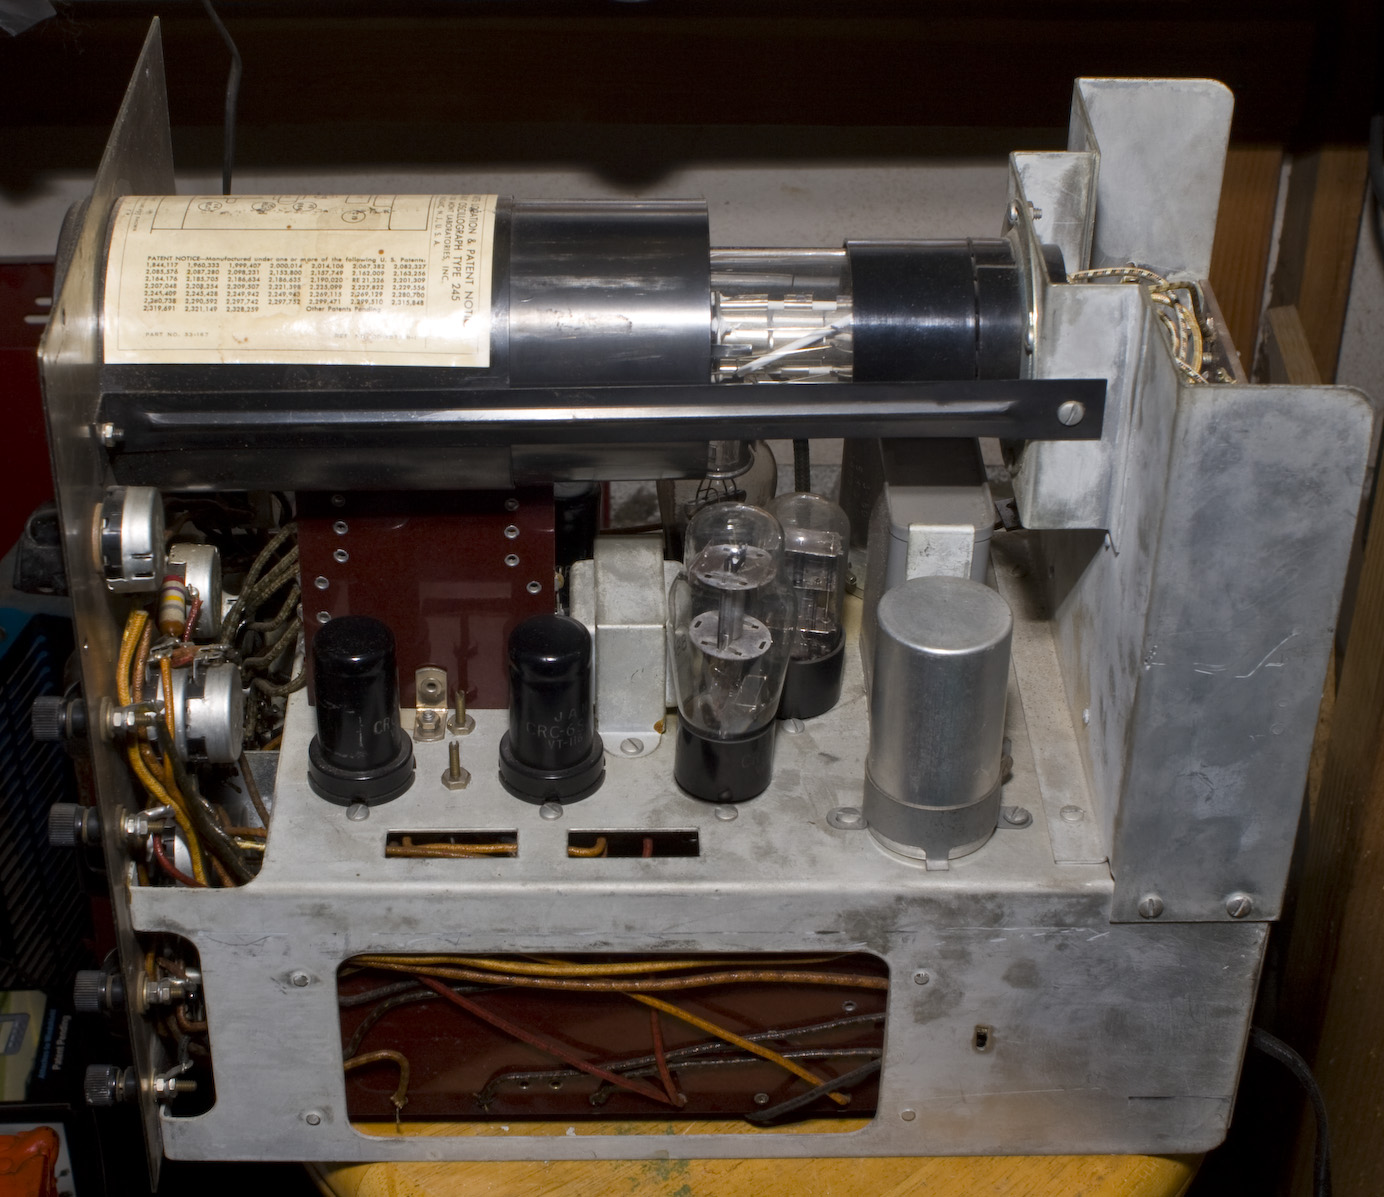
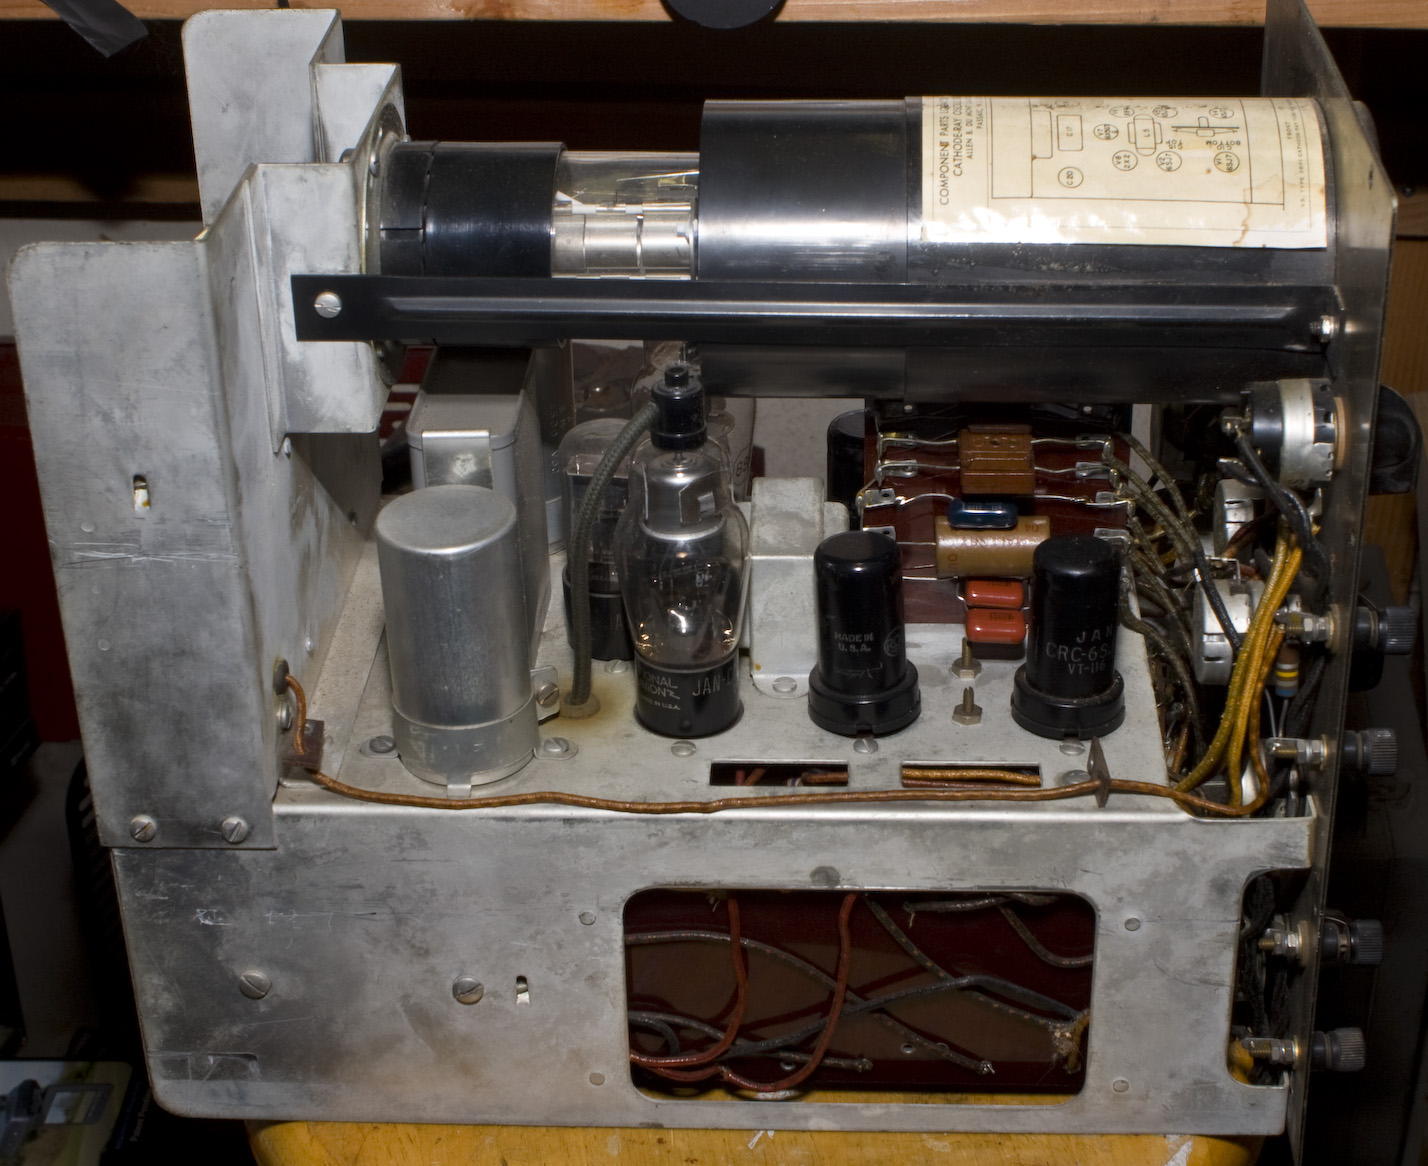
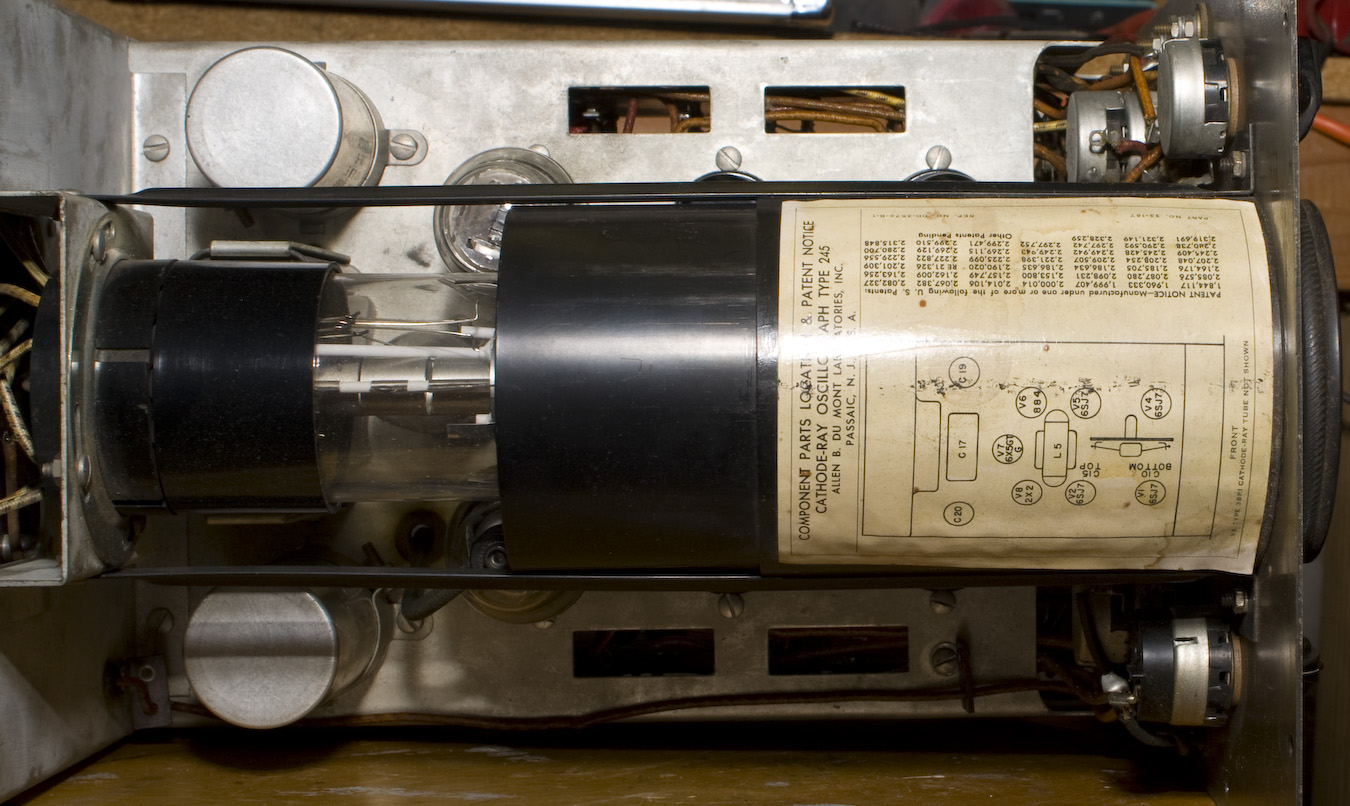

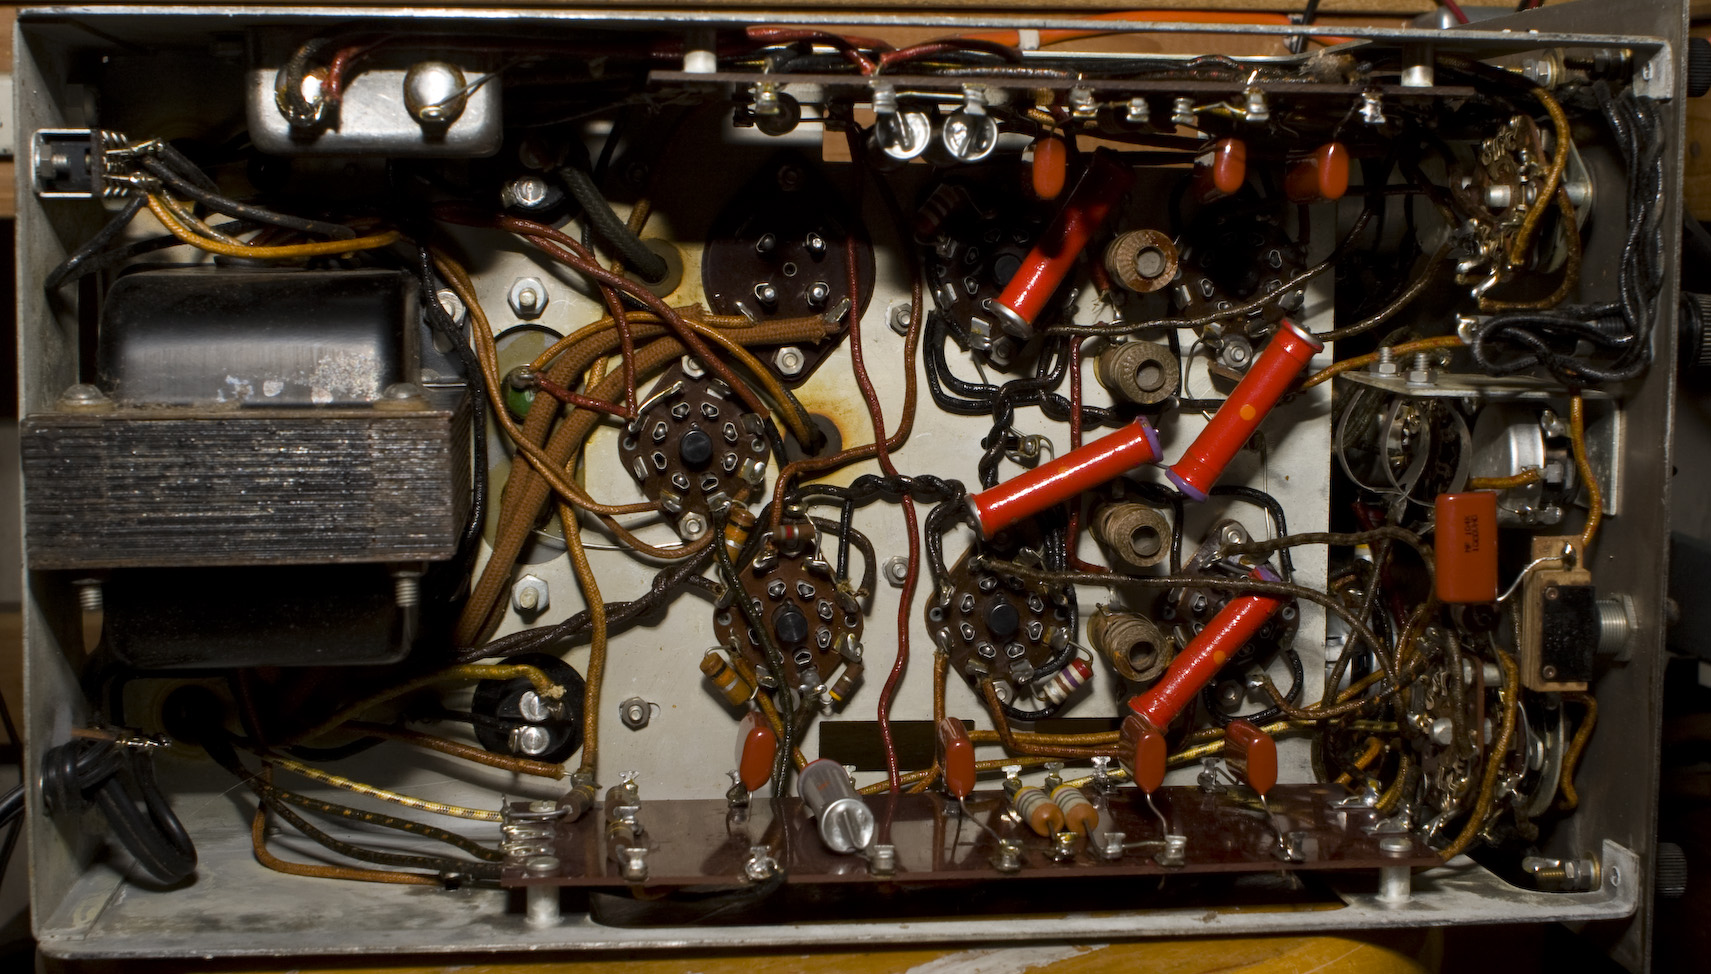
This is a thing of beauty. It was made at a time when men (or women) sat hunched over a workbench, wiring these by hand, their brains softening from inhaling solder smoke. And yet the workmanship in this is wonderful. It wasn't slap-dash, get it down and move it along. I'm sure they had production targets and minimums and no time to goof off, but they still did an excellent job.
Seriously, sometimes the point-to-point wiring looks like a rat's nest. I know this is aided by having a lot of cabinet and not so many components, so they had room to spread things out. But still, I get the idea this was made by people who cared about what went out the door.
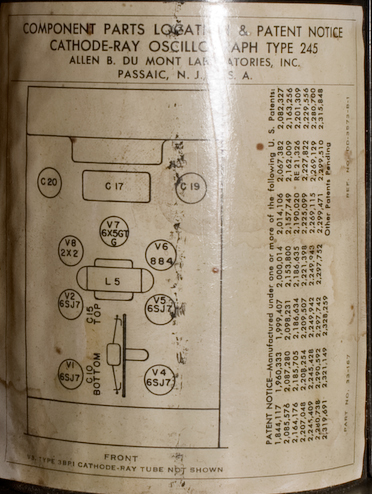
This is a DuMont Type 245 Oscillograph, made in the early 1940s, as best as I can determine. I haven't yet found a manual for it.
I didn't do an actual teardown, I just pulled the cover off to see what was inside.
Background and other information is on my Test Equipment page. .