
 The oldest radio I own. The best date for this is 1924, but could have been 1925 or 1926. There is no model name here and I haven't been able to find advertising of this particular unit, so it's tough to nail down.
One of the interesting things about this is that it takes UV199 tubes, which are old even by tube standards. There's a neat article about them at Rexophone and their relationship to the WD-11. As described in the article, I had to buy an adapter so I could run them on my tube-tester in a slightly more-modern socket.
Because the UV199 antedates the 01A tubes, I believe this radio is older than my FADA, though I'd bet only by a year or so. Plus, this Silvertone Neutrodyne was redesigned to take '01A tubes and sold a year or so later.
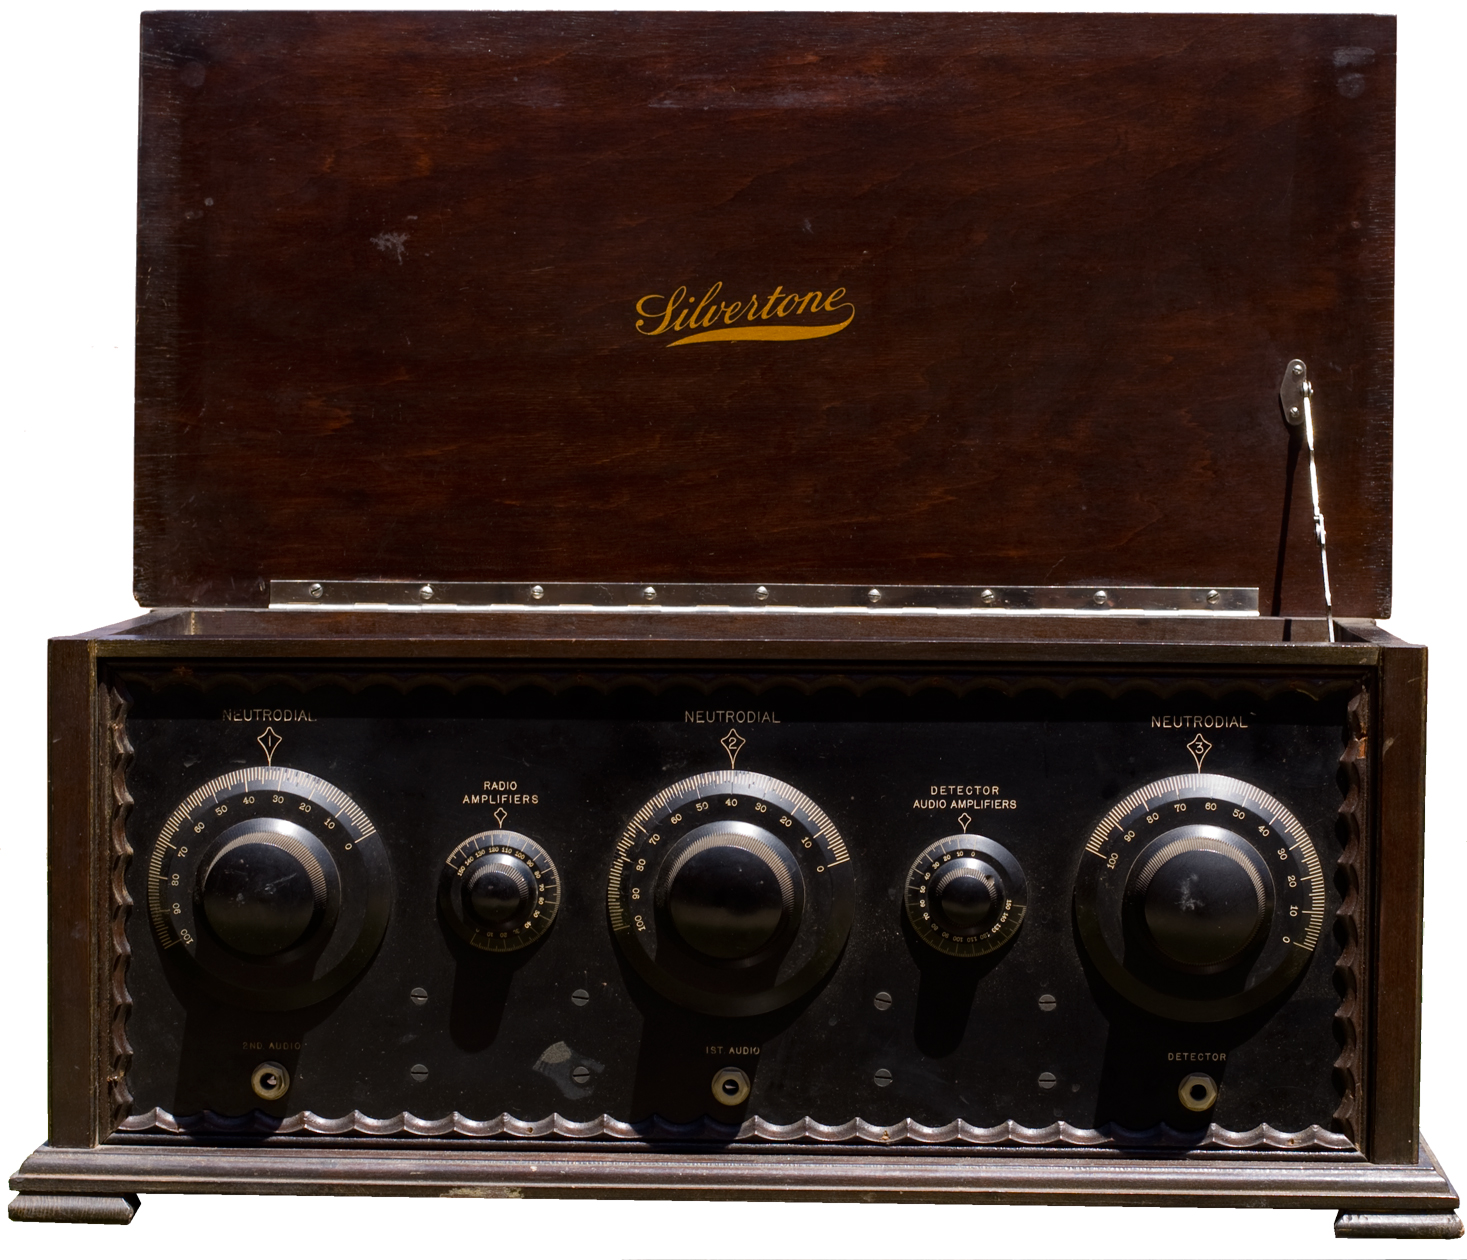
As always, click on a photo to see it larger. Left is the radio (front) with the lid opened up. The cabinet is wood (I'm not sure what it is—rosewood?).
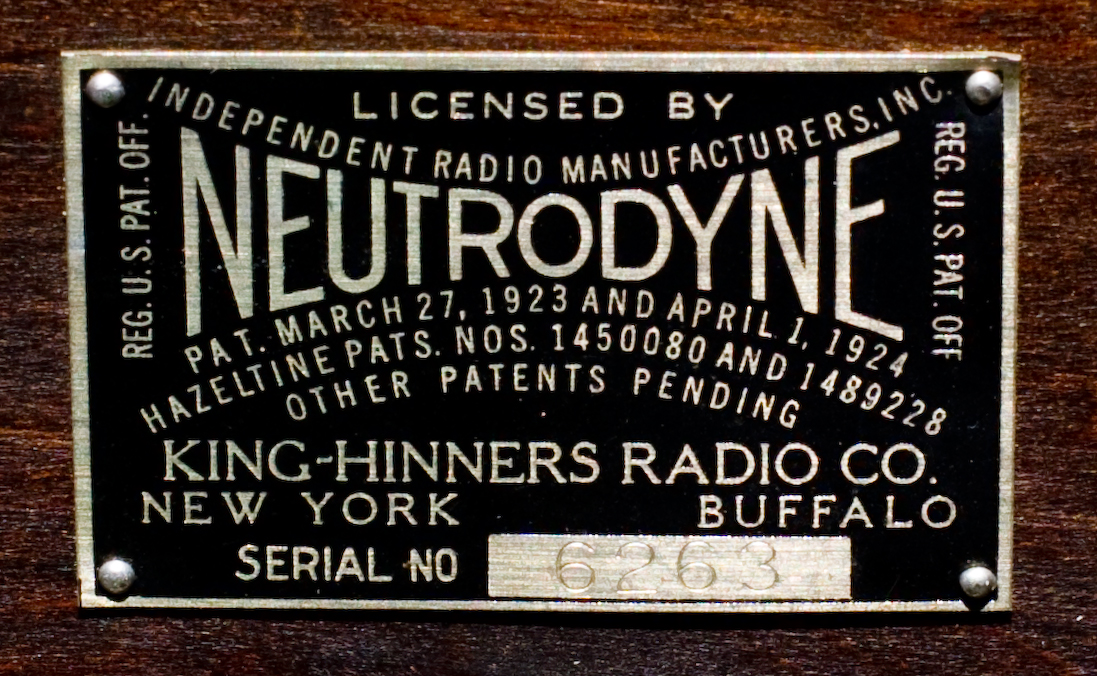
 King-Hinners (later King Manufacturing) briefly sold radios to Sears-Roebuck for their Silvertone line; it's unusual that Sears used the King-Hinners label; most subsequent Silvertone radios wouldn't directly identify the maker. Silvertone was the house-brand for Sears-Roebuck department store, and they also owned a company called Adler, so it's very possible that this radio is also an Adler 199 "Royal."
The front panel has five dials and you generally needed both hands and some skill to run it. Tuning is done by those three big knobs. You start by dialing them all to the same setting (doesn't matter which, but most people would start at the lowest number); then you turn each dial about 3 or 4 ticks. Doing that, you creep up the band until you get to the top.
The dials aren't marked by frequency, so you have to log a station if you want to remember it. Logging means you write down the station and the dial settings; next time you want that station, you turn the dials to those markings and start hunting (if necessary) from there.
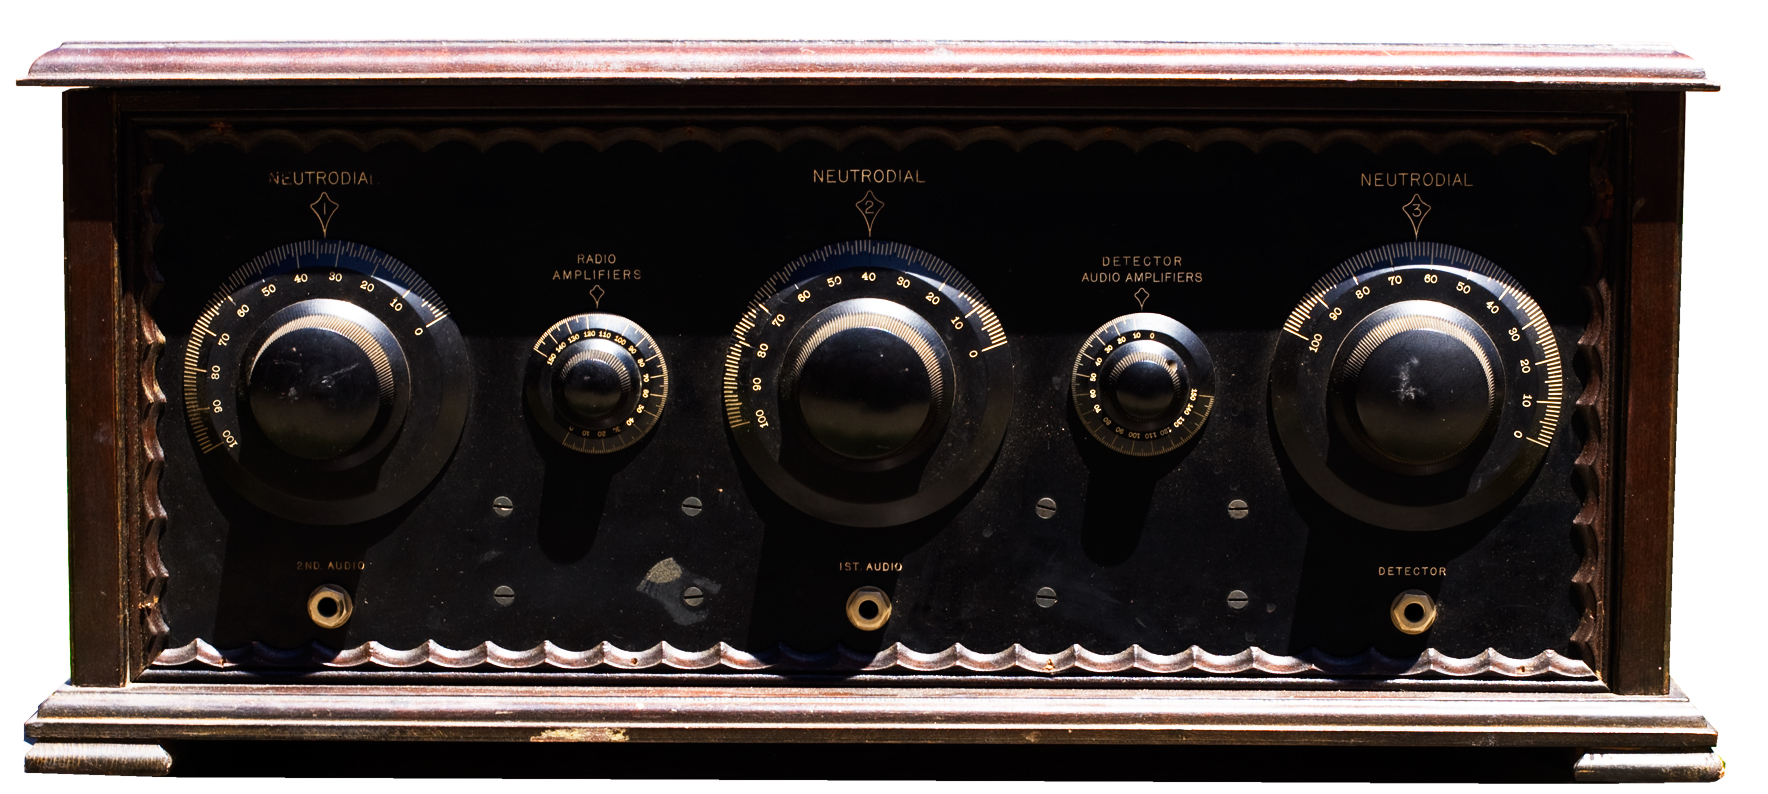 The two smaller dials handle the filaments for the tubes. The instructions say you start with them between 150 and 130, and then would dial them down as necessary. Some of it would depend on how loud the station is when it comes in. Some of it depends on the condition of the batteries. This radio was designed to run on batteries, and the filaments could be adjusted down when the batteries were fresh and adjusted up as they grew weaker. Nowadays almost anyone using this type of radio would use a battery elminator—a plug-in AC adapter. But you could rig it up to run off a bank of 9V batteries (probably wouldn't last long) or 6 or 12-volt lantern batteries. A rechargable motorcycle battery would be better.
The sockets on the front (below each knob) are for headphones or a loudspeaker (the old horn type). You plug your speaker into the one that gives you enough power to run it: usually the 2nd audio (far left) for a speaker, and either the 1st audio or Detector (middle and rightmost) for headphones.
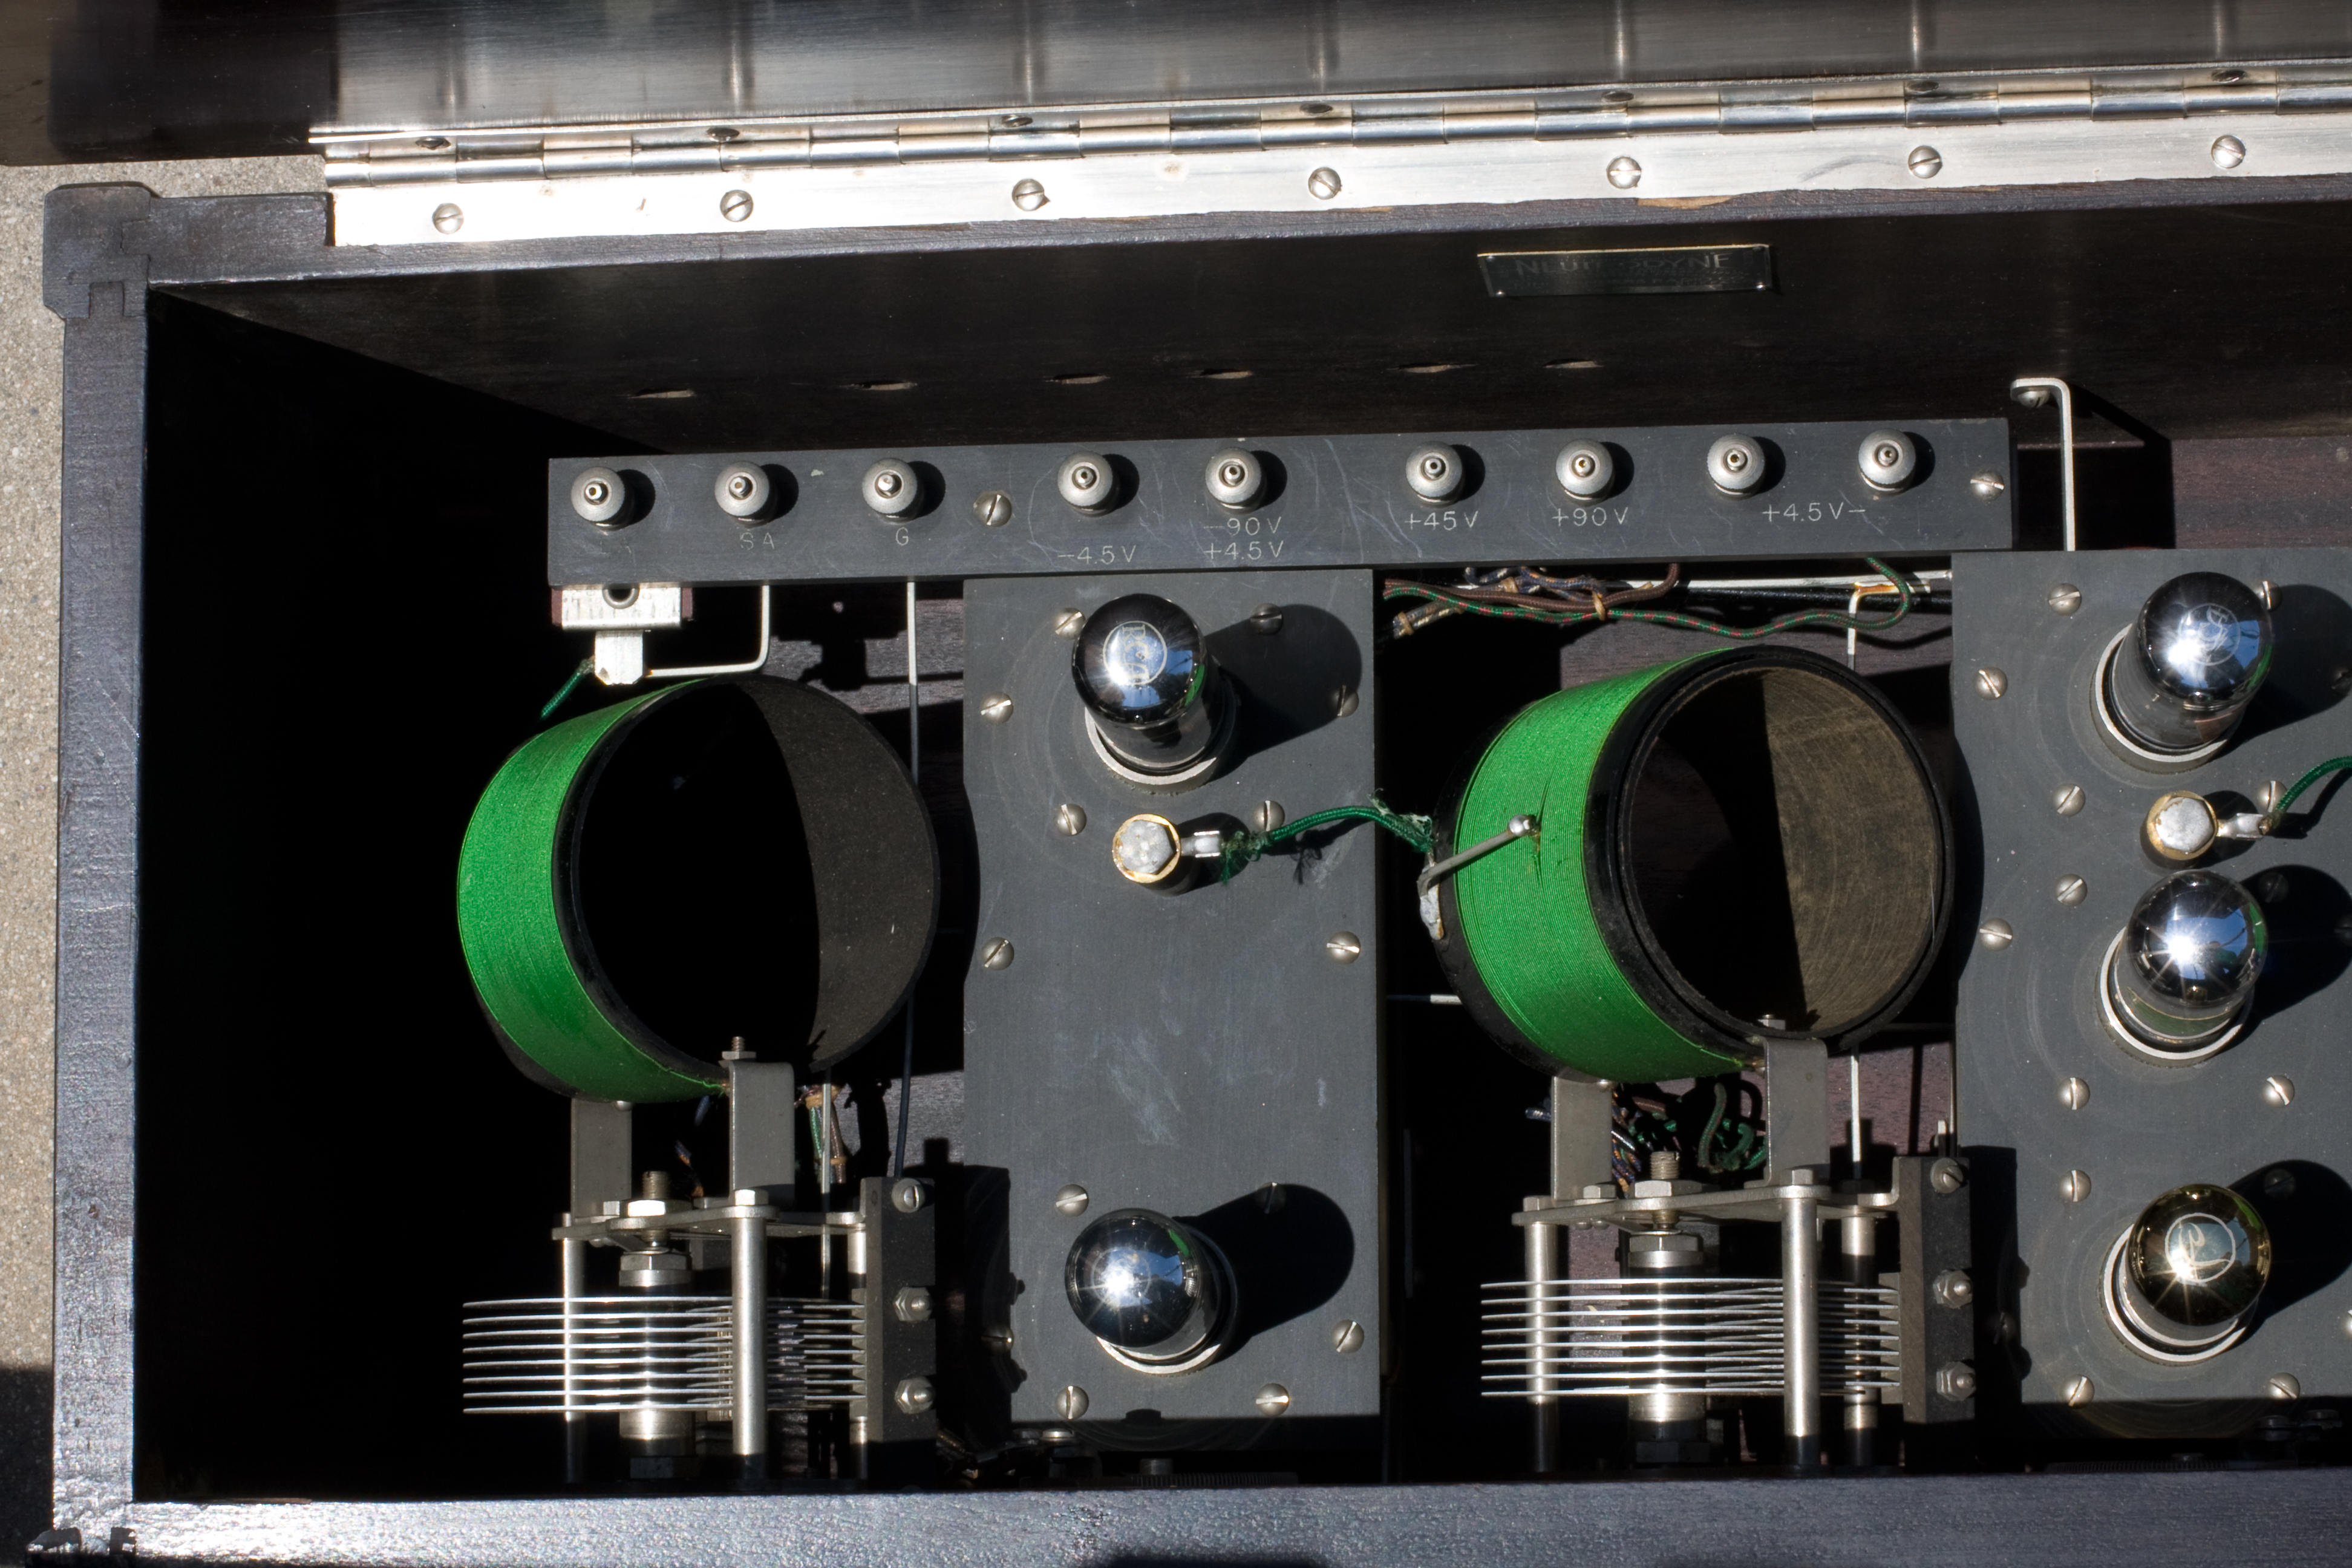 Here's a look inside. This is the left-hand side as you're facing the front panel. The thumb-screws (top) are the wire connections for various electrical connections; each has a hole behind it so you can pass the wire out through the cabinet. The three on the left are speaker connections: long wire (outdoor), short wire (indoor) and ground. The others are the various voltages needed to run the tubes.
Tubes use three "batteries" or sources of power: A (filament), B (plate) and C (grid bias). In this case, A is 4.5V, C is -4.5V, and there are two Bs: 45V and 90V. The instruction manual (click on the PDF icon at the bottom of this page to download it) includes a way of wiring up the batteries to provide all the voltages. The instructions call for four 22-½V batteries (you can actually buy them for about $10 a pop); if it were me I'd use ten 9V batteries and six 1.5V "D" cells if I wanted to replicate their setup. But I prefer to use an AC adapter.
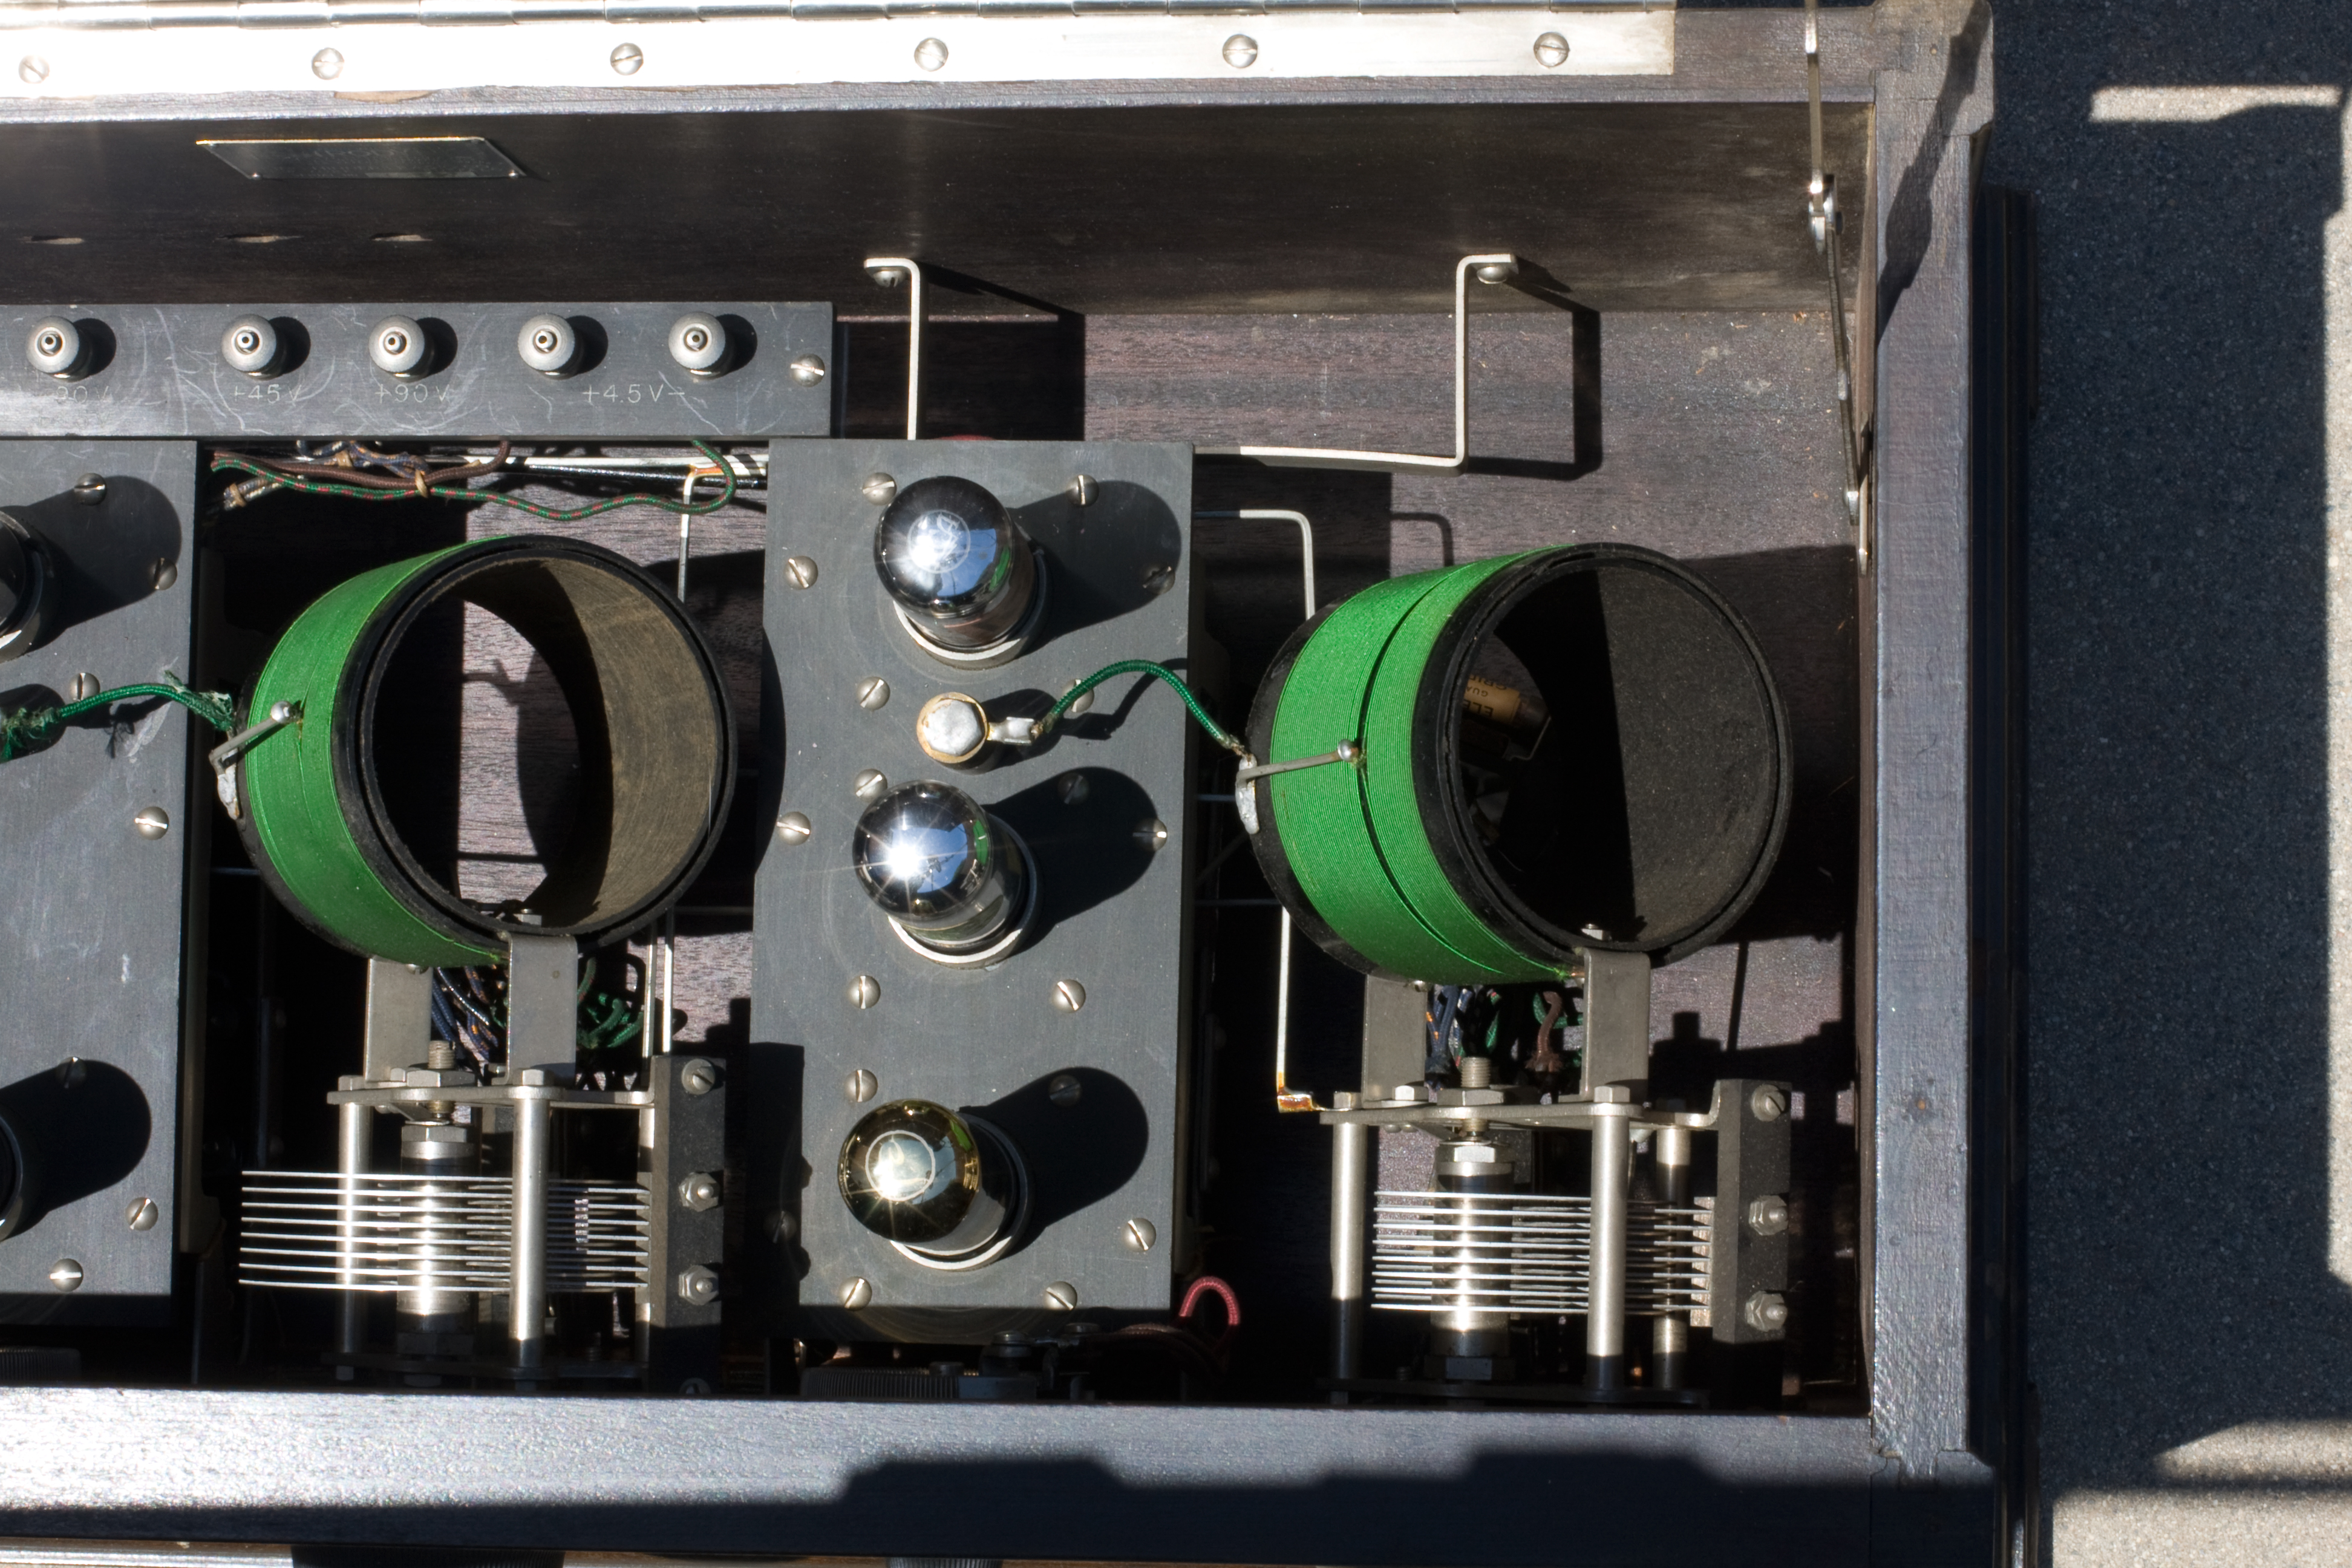 The big green tubes are the tuning coils; the shiny metal things are the tubes. These radios are usually very pretty to look at inside. I always thought they should have put a mirror on the inside of the lid to make it easy to see inside.
If you look at the coil you'll see a wire coming off it that goes to a connection between two tubes; that's the neutralizing capacitor, and that's what makes this a Neutrodyne. These radios had to be "neutralized" periodically in order to make them run properly. Neutralizing was a pain in the butt, yet it's what made this system work. Another manufacturer, Atwater Kent, finally came up with another system that did the same thing automatically; not long after, the super-heterodyne system matured and obsoleted all of this in short order.
These old radios generally don't have a huge collectable value because, unlike radios of the 1930s, there's just too much work involved to make them run. If you get a Philco cathedral it has a built-in speaker, it runs off normal house current, and (assuming it works properly to begin with) it works just like a modern radio: there's an on/off switch, a volume knob and a tuning knob. Even my Philco Baby Grand takes relatively inexpensive, fairly easy to find tubes. This neutrodyne takes '99 tubes, which are somewhat rare and pricey (figure $50 each for good ones); you have to either make or buy a battery elminator or wire your own battery supply; and you either need an old speaker (modern speakers won't work on it) or old high-Z headphones. And you need a good AM antenna. And then of course you have to learn how to neutralize and tune it.
 I was lucky enough to get the original instructions so I made a high-quality scan. You can download it here (right-lick and Save As... to your hard drive.) There is no schematic diagram, unfortunately. I've been looking but so-far I have not found one for it.
I also have a King-Hinners Model A instruction booklet on my manuals page. The radios are very similar, except that the Model A is wired for 01A tubes.
Current status: needs antenna; needs to be hooked up to the power supply and tried out.
.jpg)